Beginning to bake #4: Bread in an hour

We’re on to post four of my baking mission – read the original rationale here. In this Lent project, we’ve gone from pancakes to muffins to scones. And now we’re starting bread.

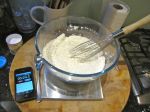
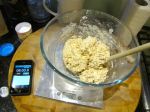
But not scary yeasted bread – that comes later. A soda bread that can be ready in an hour. And that’s an hour from walking in the door to eating it (I timed it in case you didn’t believe me, and you can see the timer running in the photos).

Bake 35-40 mins

Soda bread and scones are very closely related. Instead of yeast, soda bread again relies on baking powder or bicarbonate of soda for leavening. As the name suggests, soda bread is most often made with bicarbonate of soda (baking soda if you’re in North America) along with something acidic like buttermilk. And apart from flour and a bit of salt, that’s all you need. A little melted butter is often added to make it more tender. There are also recipes with more butter, some sugar and raisins that make something more like a tea cake or a scone – also very good, and see the Smitten Kitchen variation below, adapted from the New York Times, which suggests serving with some cheese and apples.

IMG_0083

Back with a more austere recipe, with so little in the way of ingredients, you really need good flour, and proper seasoning to get a good flavour from the bread. Wholemeal or a mix of plain and wholemeal flour gives you a wheaty flavour and a more interesting texture. Spelt flour is also good, and small parts of rye flour mixed in will give another flavour again. Stoneground flour has more flavour than regular flour – the grinding process will incorporate the germ and more of the oils into the flour, so you can often see a visible difference, and it looks creamier than steel-ground plain flour.

Like scones, this bread will also stale fast, so it is best made and eaten warm on the same day (although it will also make decent toast the following day). But it’s so quick that there’s no need to keep it hanging around. Just make it when you want it.

Equipment:

Nothing new here: scales and measuring spoons, plus:

  • Bowl
  • Wooden spoon
  • Baking tray

Basic recipe:

  • 200g plain flour
  • 200g wholemeal plain flour
  • 1 teaspoon bicarbonate of soda
  • 3/4 teaspoon salt
  • 190g yoghurt + 140g milk (or 330ml buttermilk)
  • 1 tsp honey (optional)

Turn the oven on and set the temperature to 200C or 180C for a fan oven.

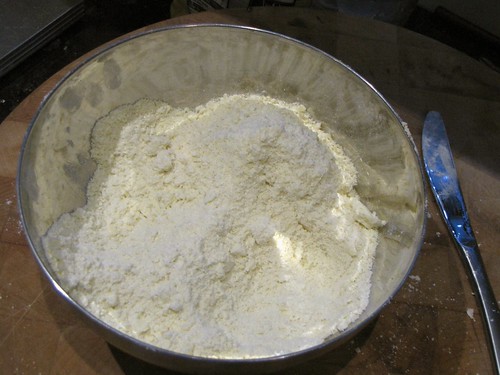
Weigh the flours into the bowl. Add the bicarbonate of soda and salt, and combine with a whisk.

Weigh flour and bicarb

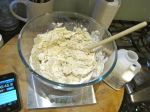
Add the milk and yoghurt to the bowl. Add the honey on top if using, then use the spoon to mix everything together until you have a sticky ball of dough.

Mixed dough

Sprinkle plenty of flour on a board or the counter. Scrape the dough out onto it.
Turn onto floured counter

Sprinkle the top with more flour, and flour your hands. Fold each edge over into the centre to make it into a ball. It will be very sticky. Use plenty of flour, and don’t handle it too much. Just get it into a rough ball shape.

Fold into a ball
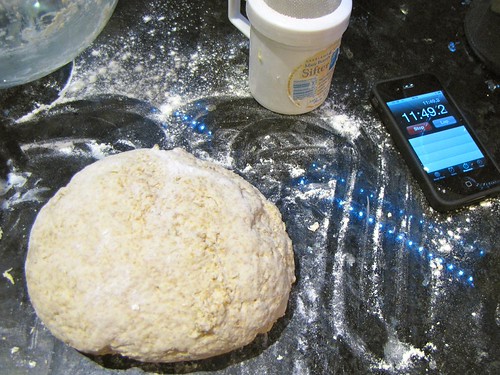
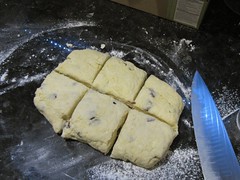
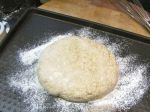
Lift the ball gently onto the floured baking sheet. Pat it out to about 3cm thick, just flattening it a bit.

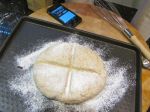
Flour the handle of your wooden spoon, and press it into the surface of the dough to make a cross. This will give the dough room to expand in the oven, and help the loaf to rise a little, giving a lighter crumb.
Mark cross with a spoon handle

Put the tray into the oven and set the time for 35 minutes. After that time, check the loaf. It should be a dark golden brown. If you’re not sure, bake for another 5 or 10 minutes. I baked for 40 minutes at 180C in my fan oven. An oven without a fan will take longer.
Bake 35-40 mins

Leave to cool on a rack for at least 5 minutes, and then slice and enjoy warm with butter.

Serve warm

Variations:

Lorraine Pascale Soda Bread

Lorraine Pascale has a lovely recipe which makes a large loaf. She uses treacle to give the loaf flavour and a little sweetness.

Smitten Kitchen – Skillet Irish Soda Bread

Smitten Kitchen adapted a New York TImes recipe to make a much sweeter, more cake-like loaf, that is still incredibly good. I like to bake this one in my deep oven-proof cast-iron pan, lined with baking parchment, but it will work on a baking sheet as well.

Richard Corrigan – Whole poached wild salmon with wheaten bread

In Northern Ireland, soda bread is often known as wheaten bread. Here Richard Corrigan of Lindsay House and Bentley’s Oyster Bar in London, gives his wheaten bread recipe.

Beginning to bake #3: Scones for tea

Baked scones

Scones are easy to make at home, but so hard to buy. If you’ve never had a homemade scone, the chances are you’ve never had a good one.

Scones also keep very badly. Even the next day they become dry and crumbly. So the solution is to bake them the day you want to eat them, and if necessary, freeze any leftovers that day. They are the sort of thing the fifties domestic goddess would start to make because someone had dropped around unexpectedly – quick, and best eaten fresh from the oven.

Why are scones next on the ‘how to bake’ list? Like pancakes and muffins, the ingredients for scones are pretty simple, and rely principally on baking powder to make them rise. You just need flour, butter, milk, baking powder and maybe a little sugar to to put them together. Some add eggs to the recipe, but I’m sceptical – that seems to make a much cakier thing, and not a proper cream-and-jam scone.

The differences are that you use cold butter, and you rub the butter into the flour, creating crumbs. ‘Rubbing in’ the butter is something you also do with shortcrust pastry. It involves cutting the cold butter up into pieces about the size of peas. Then you use your fingertips to rub the lumps of butter into the flour. This distributes the butter through the flour, coating some of the flour with fat, and waterproofing it to restrict the development of the gluten when the milk is added. You want soft and tender scones – too much gluten would make them tough and chewy.

For the same reason, you want to play with the scone dough as little as possible – don’t knead it or smush it around. Use a spoon to mix the dough together, then your hands very briefly to make sure all the floury bits are incorporated. You need to make sure it forms a single lump of dough, but no more than that.

To make the scones, you can flatten the dough with a rolling pin or just use your hands. It just needs to be patted out to about 2cm high. The thicker the dough at this point, the taller your final scones will be.

You can use a cutter or a glass for round scones. For minimum waste, just cut the dough into wedges or squares with a sharp knife.

Glazing the scones is optional, but it will give you a beautiful shiny golden top. The ideal is a beaten egg, or a yolk beaten with a little egg or cream. Some milk or cream on it’s own will also do, but won’t be as golden. Try not to drip glaze down the sides – it can limit the rising in the oven.

Equipment:

  • Bowl
  • Spoon
  • Knife
  • Pastry brush
  • A solid baking sheet. That means thick sheets of metal, probably aluminium. Can be non-stick, anodised or plain. You need it thick and heavy so it won’t warp and twist in a hot oven.
  • A round cutter (optional: the end of a water glass will also work, or use a knife to cut squares.

Basic recipe:

Adapted from Nigella Lawson’s ‘How to be a domestic goddess’:

  • 250g plain flour
  • 1/2 tsp salt
  • 3 tsp baking powder
  • 70g cold butter
  • 2 tbsp / 30g caster sugar
  • 130ml milk (full fat if you can)
  • 50g sultanas or raisins for fruit scones
  • 1 egg plus 1 tbsp milk for the glaze

Method:

Put the flour, salt and baking powder in a bowl and mix togther with a whisk.Slice or cube the cold butter and put it into the flour.

Flour and butter

Use a butter knife to slice through the butter, reducing it to small pieces in the flour.

Once you’ve sliced it up as much as you can, use your fingers to rub the butter and flour together. The movement you want is something like the ‘money, money, money’ gesture – rubbing your thumb along the fingers of the same hand and back again. The trick is to get the bits of butter and flour in there so that as you rub your fingers together, the butter and flour get pushed together. Using your fingertips keeps everything from warming up too much – your fingertips are cooler than your palms.

Butter rubbed into crumbs

Once the butter has almost disappeared, and the mixture looks sandy without any big lumps, add the sugar, and raisins or sultanas if you want to use them.

Add the milk and stir everything with a spoon or a knife to make a dough.

Mixing into dough

Once it’s almost all mixed, use your hands to push and squash it until there are no more floury parts and the whole thing comes together in a single ball, leaving the bowl virtually clean.

Ball of dough

Take a small handful of flour and scatter it over a counter. Tip out the ball, and if there are any big fissure or cracks, push them together. Push the ball out to flatten it to a roughly rectangular piece about 2cm thick. Use a cutter to cut round scones, or a knife to cut into 6 square ones.

Cutting scones

Cut scones

Put the scones carefully on a baking sheet.

Scones on the tray

Beat the egg with a little milk (or just use milk on its own) and use a pastry brush to glaze just the top of the scones. This will make sure they get a golden colour in the oven.
Bake for 10-15 minutes at 200C until risen and brown on the top.
Cool on a rack and eat as soon as possible (or freeze).

Baked scones

Variations:

The Guardian: as part of a series, Felicity Cloake investigates the recipe for the perfect scone

Baker Paul Hollywood was featured on BBC2’s the Great British Bake-off. He says his scone recipe is perfect.

Delia has a step-by-step on how to make scones on her website.

Beginning to bake #2: Raspberry muffins

This is the second in my series of Lent posts on simple baking. After pancakes we move on to muffins, and the first item that is actually baked.

The word muffins is used for all sorts of things, including split and toasted English muffins, made with yeast, and those cakey things sold in plastic wrappers with a spookily long shelf life. We’re not talking about either of those here. What we’re aiming for is a not-too-sweet bun, with some pieces of nuts or fruit adding texture, that’s moist and quite good with breakfast or a cup of tea. The classic would be a blueberry muffin, the firm berries providing little pockets of purple juice, but in this case, I’m doing raspberries, because that’s what I had in the freezer. And I like raspberries better.

The logic for moving from pancakes to muffins is that the mixture is made in a similar way: you mix dry ingredients, including flour and baking powder, and add wet ingredients, including milk and egg, and mix together very briefly. This is a thicker mix, so it is baked in a muffin tin in the oven instead of being cooked in a pan.

My preferred recipe for muffins uses mashed bananas as part of the wet ingredients. I think this gives a great flavour, and it helps to use up the over ripe bananas that I always seem to have. However, I’m trying to make these recipes as straightforward as possible, and you don’t always have bananas just lying around. So this is a plain version. But if you find yourself with bananas on the turn, I urge you to try one of the recipes in the Variations section below.

This version can be used with other berries instead – blueberries would work very well (it’s originally adapted from Nigella Lawson’s blueberry muffin recipe). Frozen berries can be easier to work with, as they don’t smush when you stir them in. Or you can use other fruit, chopped nuts, citrus zest or chocolate chips as the flavouring instead. As these muffins are quite plain, it’s also nice to add something crunchy to the top – crunchy sugar, and chopped nuts or flaked almonds are good. But all these things are optional and flexible. Start with something straightforward and go from there.

Equipment:

In addition to scales and measuring cups:

  • Bowl
  • Wooden spoon / silicone spatula
  • Jug or small bowl for wet ingredients
  • Muffin tin (can be pretty cheap, doesn’t need to be non stick if you’re using cases)
  • Muffin paper cases
  • Spring-loaded ice cream scoop (entirely optional, but really good for dividing muffin batter into cases. If you get addicted to muffins, get one).

Basic recipe:

Wet ingredients:

  • 100ml/g milk (as before, milliliters and grams are the same thing for milk and water)
  • 100g yoghurt
  • 1 large egg
  • 75ml vegetable oil (near enough 75g)

Dry ingredients:

  • 200g plain flour
  • 1 teaspoon baking powder
  • 1/2 teaspoon bicarbonate of soda (baking soda)
  • pinch of salt
  • 75g caster sugar

Flavourings:

  • 200g raspberries – fresh or frozen

Topping (optional):

  • flaked almonds
  • demerara sugar – a couple of tablespoons of each

Method:

Preheat the oven to 200C / 180C if it’s a fan oven.

Measure the dry ingredients into a large bowl. Use a whisk to combine them, and make sure the baking powder and bicarbonate are distributed through the flour.

Measure the wet ingredients into a large jug or a small bowl. Use a whisk or a fork to break up the egg and combine it all together.

Pour the wet ingredients into the dry. Mix the two together gently. Once they are most of the way combined, but still with dry patches, add the raspberries. Frozen berries are easier to mix in, but fresh are good too.

Divide the mixture between the muffin cases. Sprinkle a few flaked almonds and half a teaspoon of sugar onto each muffin. Bake for 20 minutes at 180C.

Once they are golden brown on top, and they spring back if you press the top gently with your finger. Leave the muffins to cool for five minutes in the tin, then lift them out using the cases and set to cool on a wire rack (a grill pan will also work).

Muffins are best eaten on the same day, or the day after. If you want to keep them longer, the best thing to do is put them in a plastic box or a ziplock bag and freeze soon after baking.

Variations:

Banana muffin variations: Cherry and almondCoffee ginger walnut

Dan Lepard has a recipe for mocha fig muffins that are both dairy and egg free.

Marmalade makes a good muffin – it adds moisture from the pectin in the marmalade.

Beginning to bake #1: the pancake plan

As I explained in my previous post, the challenge I have set myself is to set out a series of steps to help someone to learn to bake. The idea is to build each step on a platform of existing knowledge.

Thinking through possible starting points, I’ve decided to assume only the skills needed to fry things. If you can make a basic stir fry, or cook up some bacon and eggs then you should be able to make pancakes.

Although cooked on top of the stove, and therefore not strictly baking, pancakes have many things in common with baked goods. They are made of flour, eggs and milk, and in the case of these puffy Scotch pancakes, leavened with baking powder.

Cooking them on a pan also allows you to easily tell when they are cooked, one of the harder things for novice bakers.

A word about equipment: I am going to try and keep equipment needs to a minimum, and to increase what is needed by only one or two pieces each time. However, there are a couple of things that I think are essential for baking of any sort. One is a set of digital scales – I really wouldn’t want to ever bake without them, although American cooks seem to have avoided them for decades. Because you can zero them out with a bowl on there, you can often measure everything into one bowl. You can also more or less get away without a measuring jug for liquids, because they can be weighed too (remember that 100ml of water weighs 100g, and that goes for milk too). So, get a good set of digital scales, with a flat top and a zero button – they should be about £20. You will also need measuring spoons – at least 1 tablespoon, 1 teaspoon and a half teaspoon. Don’t use cutlery – it’s very unlikely to give you the same measure.

Apart from those two baking essentials, for these pancakes, you will also need a frying pan, a bowl or large jug, a whisk and a large spoon or a ladle (to pour the batter into the pan).

Basic recipe:

  • 120 grams plain flour
  • 2 teaspoons (tsp) baking powder
  • Pinch of salt
  • 150 millileters / grams milk
  • 1 large egg
  • 1 teaspoon sugar

This is a fairly simple ingredients list, so you may find you have everything on hand anyway.

If your baking powder has been untouched for years, it’s probably worth getting a new pot. Baking powder is just a mixture of a powdered acid and a powdered alkali. When you add liquid, the two react, producing bubbles of carbon dioxide that make baked goods light and fluffy. Modern baking powders are often ‘double-acting’, releasing gas when the liquid is added, and then again when heat is applied in the oven.

If it’s old, it can lose it’s potency.

Method:

Measure the flour, baking powder and salt into a bowl.

Add the sugar. Use a whisk to combine them together, making sure the baking powder is evenly distributed in the flour. If you have a sieve, you can put that on top of the bowl before you zero the scales and sieve them all together, but the whisk does a pretty good job. Watch out for lumps in the baking powder – those are harder to remove with a whisk.

Add the milk and the egg to the centre of the bowl, and use the whisk to combine everything together.

You need to mix the liquid and flour completely, but you don’t need to beat it hard and remove all the lumps. Whenever you add water to flour, you will start to develop gluten, the stretchy protein thy gives bread it’s texture. If you beat this batter hard, you will develop the gluten more, and the pancakes may end up chewy.

Heat a frying pan over a medium heat.  Non-stick pans are very helpful, I used a cast iron pan, but use whatever you have. Add a little butter, allow it to melt, and then wipe the pan with a paper towel to coat the pan with fat, and remove the excess.

Use the spoon or ladle to add about a tablespoon of batter to the hot pan. Spread it a little to form a circle, then leave it to cook.

You’ll know it’s ready to turn over when you have little bubbles over the surface, and the top of the pancake has almost all set, with virtually no liquid left. Turn over with a spatula, and cook the other side for a few minutes. You’ll know you have the heat right if the pancake is a perfect shade of golden brown when the top is set. If it looks too pale or too dark, adjust the heat.

Continue cooking the pancake like this, on batches. Get as many as you can in the pan, without them flowing into each other. If they do touch, use the spatula once they are set to separate them, then continue.

Keep the cooked pancakes warm on a plate or baking tray in a low oven (about 120C), covered with a tea towel.

Serve hot with maple syrup and crispy bacon. Or make then for afternoon tea, and serve with jam.

You can also freeze the pancakes after they have cooled. Interleaved them with greaseproof paper or baking parchment if you want to remove them individually, and freeze in a sealed box or freezer bag. Reheat frozen pancakes a few at a time in the toaster, or wrap a larger stack in foil and warm in the oven.

Variations:

Not giving up, but getting started for lent

Lent is supposed to be a time for fasting. I’m not Catholic, and I don’t subscribe to the idea of good and bad foods, so giving up something for lent isn’t something I do. But this year I wanted to use the idea of doing something different, challenging myself to do something for a fixed period of time, to achieve something concrete.

I have lots of ideas for projects, but seldom put them into action. I recognise myself as a ‘scanner’, a term the writer Barbara Sher coined, and a quality shared with John Williams, the author of Screw Work, Let’s Play, who organises a monthly Scanners night in London.

I also heard on the twitters that Matt Cutts did a great talk at this year’s TED conference on his 30 day challenges. (The videos from this year’s TED aren’t online yet, so I’m just going by the tweets and blog posts of those who attended). He has written on his blog about these – he challenges himself to do somethig new for 30 days, and tries a new thing each month.

I went to my first Scanners night this week, and inspired by that, Lent and Matt Cutts, I’m going to try a new project on the blog until Easter.

Starting with this diagram that I drew a few weeks ago, I want to see if you can teach people to bake with a series of connected steps, each one building on the last. Explaining this at Scanners night, someone asked ‘well, I know how to make a stir-fry, but how does that help me to connect with anything on the diagram?’ That made me ask myself, where would you start if you had never baked before? If you’re happy making a stir fry, how do you take those skills to help you get started baking?

So that’s the challenge: can you go from making a stir fry to making a cake? Can I link the skills and knowledge you need to take you from one to the next? And can I do it in just 10 steps?

I’m going to see if I can cover all 10 steps on the blog before Easter, as well as putting together some of the ideas and resources on a separate site.

I hope it will challenge me to blog more, to write more, and to think about some of these baking challenges a bit more deeply. I hope you will follow this project, and that even if you’re an experienced baker, you will find something new to try.

Lemon yoghurt cake

Last Sunday, the rain came down, there was nowhere in my house that wasn’t covered in dust, and I was hiding in the bedroom. Sometimes, the only way to get yourself out of this sort of slump is to bake. So I surfed around to find a regular, plain and everyday cake that I could make. The first place to look was Smitten Kitchen, a great resource for friendly home baking as well as weeknight dinners and birthday cakes.

One of the elegant things about this cake is that it requires no butter, only oil and yoghurt, so you don’t need softened butter on hand, or a mixer to put it together.

What I ended up with was a version of Smitten Kitchen’s lime yoghurt cake with blackberry sauce, which is itself a version of a traditional french yoghurt cake. Having zested part of a lemon earlier in the day, I decided to make this a lemon cake, using up the rest of the lemon zest and the juice.

  • 240g plain yoghurt
  • 80g sunflower oil
  • 230g caster sugar
  • zest and juice of one lemon
  • 2 eggs

–> whisked together

  • 190g plain flour (I used about 1/2 cup wholewheat self-raising)
  • 1 tsp baking powder (1.5 if flour is all plain)
  • 1/2 tsp bicarbonate of soda
  • 1/8 tsp salt

–> into a sieve above the wet ingredients, sifted in, and stirred together until just combined, just until the streaks of flour are gone and no more.

Pour half of the batter into a 22cm/9 inch springform tin. Put small dollops raspberry jam onto the batter – entirely optional, but really very good. The only disappointing thing is that the jam sank to the bottom of the cake. Cover with the other half of the batter.

Bake for 40 minutes at 160C until the top springs back, and it’s very slightly browned.

Food magazines

You wait all month and then three come along at once.

Delicious, Waitrose Kitchen and Bon Appetit food magazines

My food magazines all turned up together this month. I try not to overindulge in these things – too often they are full of recipes I don’t want to make, and concerns I don’t care about – feeding children, losing weight. Not that there’s anything wrong with those, they’re just not my concern. But sometimes I get a lot out of them, and more so when I mark up the interesting things so I can go back later when I need inspiration. So here are the things I’ve marked to try and make sometime soon.

Bon Appetit, March 2011

I subscribe to Bon Appetit, so it’s delivered to me from the US – otherwise it is pretty hard to find in the UK. It’s not as good as the discontinued Gourmet was, but I still enjoy hearing about things on the other side of the Atlantic, and it has a good mix of columns and recipes.

  • Clotilde Dusoulier (of Paris blog Chocolate and Zucchini) has a ‘snob-free’ guide to Paris in this issue. I’m planning a trip there soon – it’s been ages since I last went and it’s just 2 and a half hours away from the centre of London. It takes longer to get to Yorkshire.
  • Lemongrass bars with coconut shortbread crust sound like an interesting twist on classic lemon bars.
  • In a Baked pasta special, the best sounding is ‘Rigatoni with eggplant and pine nut crunch’. Roasted vegetables are mixed with pasta and tomato sauce, topped with a rough pesto and lots of cheese, and baked. Yum.
  • Sticky Toffee Banana pudding, in a section on desserts from the pantry. I’ve been thinking about warm desserts that you could freeze in individual portions and reheat, and this would fit the bill.

Waitrose Kitchen, March 2011

What used to be Waitrose Food Illustrated has become Waitrose Kitchen. Unfortunately, this has reduced the number of longer articles and more complicated recipes, with more ’30 minute meals’ content in there instead. Still, it’s a cut above most in-store magazines, and free if you have a John Lewis credit card.

  • Tamasin Day-Lewis, author of one of my favourite books, The Art Of The Tart, has a lovely looking meal of gammon, borlotti beans, potato cake and cabbage with Cashel Blue cheese. Although I probably won’t recreate the whole thing, the potato cake and beans may get used as side dishes.
  • Lamb, aubergine and tomato gratin – one of a pair of dishes, this is the rainy day counterpart to a ‘sunny day’ lamb koftas (kebab) recipe. Sounds like a less heavy version of moussaka, with a crisp topping of breadcrumbs, parsley and lemon. Perfect when spring starts to appear, but hasn’t quite got here yet.

Delicious, April 2011

I don’t often buy Delicious, but when I’m in the mood for a food magazine that isn’t one of the above, it’s the preferred one. I saw @meemalee tweet about the cover article, a beautiful pyramid of marshmallows by @beas_bloomsbury, so thought this would be a good one, and it’s definitely the best of the bunch.

  • Nigella’s weekend menu – Duck, potatoes and butternut squash salad – loved the look of this, and made something similar on Sunday, but followed Mark Bittman’s directions for crisp braised duck legs.
  • A lovely looking Easter menu of rhubarb cocktails, salad of salmon, cucumber and avocado; slow-cooked shoulder of lamb with rice, salad; pavlova with passion fruit. Keen to try making the rhubarb syrup used for the cocktails, and trying to recreate the rhubarb gin and tonics they serve at the restaurant Bob Bob Ricard.
  • There’s a good food blogging article, featuring such illustrious names as Edd Kimber, blogging at he eats and Pim Techamuanvivit of Chez Pim. Nice to see a bit of mainstream coverage.
  • Amazing looking marshmallows in white, pink and green from Bea Vo of Bea’s of Bloomsbury tearooms. It’s not often that I encounter a recipe I’ve never seen before, but I had never come across a marshmallow recipe that didn’t feature egg whites. I am not a marshmallow-lover, but the description of these is tempting even me.