Braising a blade roast of beef

Beef into the liquid

I like to braise a big piece of meat at the weekends. The smell of braising meat makes the kitchen a welcoming place to hang out, and it generates the sort of leftovers that can be very easily turned into quick after-work meals.

I love Jenny Rosenstrach’s Pork Shoulder Ragu, but this weekend I decided to do beef for a change. I asked the butcher for brisket, but they suggested it was probably too fatty for braising and proposed blade instead. And that was a great suggestion. (I bought my blade roast from the superb HG Walter in Barons Court – just the sort of place that will give you helpful advice about a good cut for braising.)

The blade roast – although I wasn’t sure when I bought it – is a cut from the shoulder. You will sometimes see beef braising meat as ‘chuck and blade’ – chuck being the other part of the shoulder. The really distinctive thing about the blade, also called the feather blade, is a central vein of connective tissue, from which radiates veins of fat, looking like a feather running through the centre of the meat. You can cut either side of this tough central vein to create flatiron steaks, or cut across for feather blade steaks. I didn’t take a picture of the meat before I started cooking, but you can see photos of what the blade steaks look like here.

Or you can do as I did, and as advised by the many, many website recipes I visited on the way home, and pot roast it until that central vein dissolves into unctuous jelly.

(I particularly liked the look of Molly Steven’s recipe for beef braised in Zinfandel).

The braising liquid could have been wine, or just stock, but I chose a dark ale – a Bath Ale stout – along with beef stock. I could also have added tomatoes to the sauce to create a more pasta-like ragu in the end, but wanted to keep the flavours cleaner, and didn’t think that the bitter of the stout plus the acid of the tomatoes would work well together.

For the stock, I used a puck of concentrated beef stock from the freezer, that I’d made when I bought beef bones last, and added to it the concentrated chicken stock that was leftover in the fridge.

Lastly, I made a couple of short videos of some the key steps – it’s a bit of an experiment.

http://cinemagr.am/show/122493631

Braised blade of beef

  • 1 blade roast of beef (or other beef shoulder joint), about 1.8kg
  • 2 medium onions, peeled and chopped
  • 1 leek, washed, halved lengthwise and chopped into thick slices
  • 2 medium carrots, peeled and chopped into chunks
  • (a stick of celery, chopped, if you have it)
  • 500ml dark ale or stout
  • 500ml beef stock
  • about 1 tsp each of thyme, rosemary and sage
  • 2 bay leaves

Tie up the beef – putting three strings around it to keep it neat and together, make it easier to turn while browning, and help it to fit into the pot. Then sprinkle with coarse salt to get a good bit of seasoning.

Heat a casserole dish big enough to take the beef – I used my 7 litre oval Le Creuset – and add a few teaspoons of olive oil. I didn’t add much more, as the beef already had a cap of fat on the top of the meat. Place the beef (fat side down) into the hot pot and let it sit and brown in the pot while you prepare the veg. You want to leave it for at least three or four minutes on a high heat for each side, to make sure you get a good brown crust. That will create lots of flavour in the final dish.

Browning the beef

Meanwhile prepare the vegetables, and gather the herbs, pausing to check the meat every now and then. These are all stock vegetables, there to flavour the braising liquid and to provide a trivet to keep the beef off the bottom of the pot. Once the cooking is done, most of the flavour will have come out and into the liquid, so the veg can be discarded. So don’t spend too long getting the pieces neat and pretty.

Chopped vegetables and stout

Once everything is browned nicely, the beef comes out onto a plate, and the veg go into the pot and start to soften.

Showing the blade

As the water comes out of the veg, it will, along with some judicious scraping, start to dissolve the sticky meaty juices on the bottom of the pot that are crucial to the flavour. After stirring veg around a little, put the lid on the pot for a few minutes to encourage more of the juices from the vegetables and to make sure that all of the sticky meat lifts from the base of the pot. (Giving the vegetables time to soften and cook a little in the fat has another benefit – it produces different flavours than you create by submerging the veg directly into the liquid. It allows sugars and other compounds to be generated in the high-heat possible by cooking in a little fat. As soon as we add the liquid, the maximum temperature will drop right down to 100C or thereabouts.)

Once you’ve developed lots of good flavours on the beef and the vegetables, it’s time to add the liquid and the rest of the flavours. First, add the stout or ale to the vegetables, stir to get up any last sticky parts, and then simmer until it’s reduced by about a third. This boils off a bit of the alcohol, and concentrates the flavours a bit.

Add the beef back to the pot, along with any juices from the plate, and finally add in the herbs and the stock, and a good bit of seasoning (if your stock wasn’t seasoned, you’ll probably need at least a couple of teaspoons of salt – taste to check).

Cover the pot with greaseproof paper (which helps to seal the pot and also makes it easier to clean up the lid afterwards!) and put into a 140C oven for 4 hours. After 30 minutes to an hour, check on the dish, and if it’s bubbling very rapidly, turn it down another 10 degrees. When done, the meat should pull apart with a fork.

After braising

Remove from the oven and leave to cool for an hour or so in the liquid. This allows the meat to rest and reabsorb some of the juices. Remove the meat into a dish to be carved. Strain the liquid to remove the vegetables and herbs, and skim off the fat (I like to use a fat-separating jug for this. Reheat the liquid and taste for seasoning. Serve thick slices of the braised meat with the strained braising liquid.

Shreds falling apart

Bonus leftovers tip: Reheat chunks of the cold meat with a couple of spoonfuls of the braising liquid (which will form a jelly in the fridge) and a splash of tomato sauce for an almost-instant beef ragu sauce for pasta.

Candied peel – why it works

Seville oranges

Whenever I make marmalade, the huge piles of wasted peel get me down. While I like the taste of orange peel, i dont like my marmalade to be jam packed with it, so I tend to include only some of the peel in the preserve. But those shiny, bright orange skins disappearing into the food waste bin is such a sad sight. Its only the exhaustion induced by the particularly time consuming method of marmalade production that leads me to discard these skins. Because instead, I could be making candied peel – and this is what I did this time.

But what is it that turns orange peel into candied peel successfully? All the recipes say different things, even though it’s a very simple recipe. The idea is to remove some of the bitterness that makes orange peel unpleasant to eat raw, soften it so you can bite through easily, and then steep in sugar syrup to sweeten and preserve it, without causing the sugar to recrystallise.

Candied orange peel

The problem is that hardly any of the recipes explain why they have the steps they do. Not understanding what’s going on really annoys me. If I don’t know the purpose of each step, then it’s much harder for me to work out when each stage is done, or to spot if something has gone wrong.

And this is a baking-type recipe – it should be precise – but when all the recipes disagree slightly, how do you know which one to follow?

In the case of the candied peel, the basic steps are:
1. Remove the peel, either by scoring the entire peel, or by peeling just the zest with a peeler (if you do that, there generally isn’t a requirement to blanch it).
2. Blanch the peel – in anything from 1–5 changes of water. (Sometimes, boil the peel until tender) as well.
3. Immerse in sugar and water, anything from 1:1 ratio to 2 parts sugar to 1 part water. This might also include some corn syrup, or some cream of tartar. Boil for anything from 30 minutes to 2 hours.
4. Put out on a rack to drain. Roll in sugar straight away or leave out to dry for a day or several days.

That’s a lot of variation for very few steps of instruction. Obviously, you’re dealing with two big uncertainties: a natural product, the orange, that can be sweet or bitter, thick-skinned or thin skinned; there’s also another uncertainty that is acknowledged in recipes much less often: your individual palate. Relatively few recipe writers encourage you to taste as you go and then adjust suit what you would prefer. Do you quite like the bitter tang of orange peel or do you have a sweeter tooth? Are you planning to use this peel in recipes where the sour contrast is going to be appreciated, or would you like to eat these with chocolate where you want things a bit sweeter?

The first part, the blanching is there primarily to remove the bitterness from the pith – or at least moderate it. Harold McGee explains:

“The outer epidermis contains the aromatic oil glands while the spongy, pectin-rich
albedo usually contains protective bitter phenolic substances. Both the oil with its
terpenes and the antioxidant phenolics are valuable phytochemicals. The bitters are
water-soluble, while the oils are not. Cooks can therefore leach the peel repeatedly
with hot (rapid) or cold (slow) water to remove the bitter compounds, then gently
cook the peel if still necessary to soften the albedo, and finally infuse it with a
concentrated sugar syrup. Through all the processing, the water-insoluble oils stay
largely in the rind.” – from ‘On Food and Cooking’

So blanching the orange peel makes it edible by removing the bitter compounds and softening the pectin. This means you should be able to taste it, and test the softness, to determine how many times you want to blanch the peel.

When you infuse it with sugar syrup to preserve it, you are trying to reach a certain concentration of sugar, and this is most easily measured with the boiling temperature of the syrup. As you boil a sugar syrup, the temperature increases as the amount of water decreases, and the sugar gets more concentrated – this is essentially what a sugar thermometer is measuring. At a boiling point of 230 degrees F / 110C you get to about 80% concentration of sugar. This is a good level for candied fruit. If you stop at a lower level, there is a risk of crystallisation, as well as a risk that the peels will remain too sticky and not keep well. This also means that it doesn’t matter too much what ratio of sugar to water you start out with – except that a weaker solution will take longer to reach the right concentration, meaning that the peel will be submerged for longer, and this can help make sure that the syrup penetrates all the way through properly, especially with thick pieces of peel.

Candied orange peel
Traditional candying processes for whole fruits – for cherries, tangerines, melon in places like France – require the fruit to be cooked in increasingly concentrated syrups over many days. This allows the sugar to penetrate into the thick fruit and ensures that the water is displaced.

Adding cream of tartar (an acid) along with the sugar helps to prevent crystallisation of the sugar in the final peels. The acid helps encourage the sucrose in the granulated sugar to break down into glucose and fructose, its two smaller units. These get in the way of the sucrose reforming nice neat sugar crystals. Adding corn syrup does a similar job – it already has glucose and fructose in it, so they also help interfere with crystallisation.

The peel should cook for a good long time in the syrup – 45 minutes to 2 hours is the general guidance. Slow is good, to make sure the peel is well infused. Then remove the peel from the syrup and spread onto a cooling rack to dry a little, and become tacky rather than sticky to the touch. Then you can roll in sugar, or dip in chocolate, as you prefer.

Links:

June Taylor and Martha Stewart making candied Meyer lemon peel – recipe and video

Smitten Kitchen making orangettes

Candied ginger, candied lemon peels, and science

Looking back at January

January snow

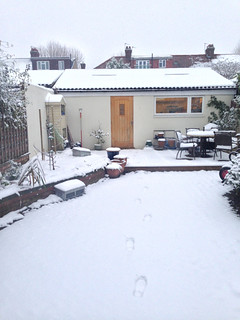
The snow coming down this morning has reminded me to look back at the first month of the year. January was a funny old month. A long Christmas break made it seem just a little shorter than normal, as did the extra-mild weather in that first week. But then we reverted, first to a bit of snow, and then to good old English rain and cold. Oh joy.

Parkrun 26 Jan

The resolutions I made are still broadly intact. I’ve been a pretty constant attendee at Parkrun. I missed one day of 750 words writing (a dinner party where we didn’t get back until after midnight), although I still need to figure out how to filter through the nonsense for things that might appear here on the blog.

The dinner diary has faired less well, with some serious gaps. Dinner has been fairly haphazard, a victim of both of our changing schedules, and we’ve eaten out a fair bit.

January is the best month for citrus fruits, because they are in season, but also because those clean, sweet-sharp flavours are just want January needs. I ordered Seville oranges with my veg box, and made marmalade with them, as well as candied peel with the rest of the skins.

Bergamot

I also came across bergamots in Gelupo, and took one home to experiment with. I decided on madeleines from a Stevie Parle recipe, and although they came out well, I would have had a tough time telling it was bergamot in there, and not something else.

Bergamot madeleines - finishing off batter from the weekend

There was also some brilliant Scandinavian pastries from Signe Johansen’s book Scandilicious Baking. These twists of cardamom-scented dough with an almond cream filling and crunchy sugar crystals on top are part croissant, part Danish pastry, part doughnut. I froze them all, and have been ekeing out the supply, taking one to work every now and then for a mid-morning pick-me-up. Some of my baking makes it to work to share, but not these 😉

Cardamom almond twists from @scandilicious baking.

I’ve also got back in touch with my RSS reader (currently using Reeder on both iPohne and iPad) and read some great pieces by food bloggers this month:

I came across the blog ‘Playing with fire and water’ when it was featured in January’s Saveur magazine, and I promptly devoured a stack of posts in a trance. It’s the perfect combination of scientific, exploratory, adventurous and beautiful. Then she wrote about the back story to that feature on her blog, and the story it was originally going to be, of her kitchen remodel, and it was like opening a treasure chest. And it’s a beautiful kitchen to boot.

Both Jenny Rosenstrach and Adam Roberts had funny, honest, helpful writing advice this month. I found them both inspiring, as I continue to struggle with getting posts up and onto this blog.