Scandinavian baking and spelt flour

Cinnamon buns centre stage

It seems there’s no escape from all things Scandinavian at the moment. In restaurants, Noma in Copenhagen is at the top of 50 Best Restaurants list for the 2nd year, and Faviken is the new cutting-edge place that has the food critics flocking across the Swedish tundra.

When it comes to cookbooks, you can take your pick from Nordic Bakery, Camilla Plum’s Scandinavian Kitchen or Signe Johansen’s Scandilicious. And that’s without getting to The Killing and that famous jumper.

At the forefront of this wave is Signe Johansen. From Norway, but having lived in the UK for 13 years, with her blog and her first book ‘Scandilicious’, she’s melded Scandi tastes with British preferences to create recipes that are approachable and easy, and bring fresh new flavours into the kitchen.

Posing for the Times

When I saw that she was offering a Baking Masterclass, with recipes from her new book, Scandilicious Baking, I signed up pretty quickly. For one thing, I love to meet enthusiastic bakers and cooks that I’ve only met virtually through twitter and their blog posts. And there’s always something new to learn in baking, especially when dealing with that tricky beast, yeasted dough.

The venue was a new cooking school in East London, the Central Street Cookery School, part of the St. Luke’s Charitable Trust. It’s a light and airy space, with high ceilings, plenty of counter space and ovens, and well equipped for classes. Even better, income from hiring out the space supports cookery projects for the local community.

The Central St Cookery school

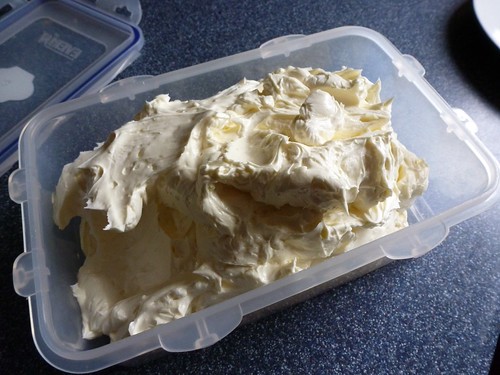
We cooked our way through four recipes, two of which were yeasted, in about 4 hours. We made a straight spelt bread dough, quite a bit stickier and faster to rise than a wheat dough. Next came super-sticky cinnamon buns, the dough enriched with butter, sugar, egg and ground cardamom. Again, these were made with spelt flour, and were quick to rise and prove. Below is a cinnamon bun cake made by jamming the bun dough into a cake tin to bake.

Cinnamon bun cake

Third on the list was a fluffy cake, topped with almond caramel praline to form a crust. This is Toscakaka, a Swedish favourite. The cake is made like a Genoise, whisking whole eggs with sugar, before folding in flour and melted butter. Once baked, a sticky caramel of butter, sugar, cream and flaked almonds is spread on top before baking further to form a golden crust. It’s a delicious combination, and the Dream cake in Scandilicious, made in a similar way, has gone straight onto my ‘to make’ list.

Toscakaka

Finally came super-short butter biscuits, made like pastry with chilled butter and just a little egg to bring them together. A very full morning’s baking. For lunch we feasted on Signe’s homemade gravlax with salad, and tried out some of the spelt bread.

Scandi baking spread

The class was good fun, with a great atmosphere. Signe gave lots of helpful tips and advice as we went along, and there was time for everyone to get hands-on with the recipes. The cookery school at Central Street has only been open for a few months, and is a great space for classes. The counters are in a big U shape, with lots of counterspace for everyone, and the high ceilings kept everything cool until later in the session.

There was plenty to learn, even for experienced bakers. Using 100% spelt dough is new to me. When I use spelt flour, it tends to be in bread dough and not more than half of the total flour content. Using all spelt flour in a recipe tends to make for a stickier dough, that rises faster and doesn’t need to prove as long before baking. It feels different to handle, and I think would take some practice to get used to.

Cinnamon bun dough

Spelt is actually a type of wheat, but split off from the wheat we now use at an earlier point in its history. This means it has less gluten than normal bread flour, but still enough to make bread with. [Correction: Azelia has quire rightly corrected me here: it’s not that spelt has less gluten, but it is of a different type and can be tolerated better by those who have an intolerance to normal wheat. Coeliacs cannot tolerate spelt, because it still contains gluten]. You can also get pearled spelt or farro, which can be cooked a bit like pearl barley, but less sticky, and can be used for risottos and salads. Both wholemeal and refined white spelt flours are readily available. Sharpham Park in Somerset produce great spelt flour, grown in the UK.

Signe is continuing to do a Scandi supper club, and planning more classes as well, so make sure you check http://www.signejohansen.com/ and follow her on twitter for the latest details.

100 years young – making Swiss buttercream

Buying a 100th birthday present is a difficult task. Any birthday present purchase can present problems, at least for me. I want to make sure I get it right. Something that will be valued, something that will be loved. Something that will last.
A present for someone completing a century on the planet is a little different. Concepts like ‘lasting a lifetime’ take on a completely different hue. It’s almost impossible to get something useful that they don’t already have. Beautiful things seem trivial, ephemeral.

When my gran, my closest and only surviving grandparent, turned 100 a few weeks ago, I wanted a gift to express love, but just buying an expensive thing doesn’t cut it with grandparents.

photo-10100

Born in 1912, the year of Titanic, she went to Jersey to celebrate her 21st birthday in 1933, hanging out with chaps in blazers and lasses in swimming costumes. Her older brothers fought in the First World War, and her husband in the Second. She was a smart and funny white-haired lady when I was born, her first grandchild, and she still is. She’s an incredible woman, as sharp and funny as ever, and coming up with a suitable gift was daunting.

We gathered as a family for a weekend of celebrating – dinners, lunches and finally an afternoon tea with cards and presents. I bought her a painted silk scarf so there was something to unwrap. But I think my main contribution to the weekend was helping with the birthday cake.

This was a real joint effort between my mum, my sister and me. Although it needed to be celebratory, and bear decoration, she didn’t want either chocolate cake or fruit cake. As she doesn’t have much of a sweet tooth, we went for lemon sponge, but that posed the question of how best to decorate it.

Having done a bit of research on smitten kitchen and sweetapolita, I decided what we really needed was Swiss buttercream. The reason for using this is that it is very stable, and can be made ahead; it is not too sweet and sickly, unlike quick buttercream or fondant; and it can be made into a smooth surface to support piped icing decorations.

Swiss buttercream is made of a mixture of meringue and softened butter. The meringue is made using the Swiss method, dissolving the sugar into warmed egg whites before beating (as opposed to the French method:whisking sugar directly into whipped egg whites; or the Italian: pouring a hot sugar syrup into whipped egg whites).

You begin by measuring the sugar and egg whites into a large heatproof bowl. I used egg whites from a carton – I know there are virtually no problems now from British eggs, and you are heating them in this recipe, but I didnt want to take any chances with a 100 year old consumer. In any case, the carton whites (available as Two Chicks in a number of supermarkets in the UK) are very convenient for weighing out a precise amount.

This mixture is then heated over a barely simmering pan of water, stirring constantly, until it reaches 60c and the sugar has all dissolved into the whites. You can check this by rubbing the mixture between your fingertips to check that all the gritty sugar crystals are gone.

Then the warmed egg white syrup is whisked into stiff meringue peaks. We made two batches of the buttercream, fearing that my mum’s handheld electric mixer might not handle a full batch. Neither batch reached stiff peaks at this stage – both were still flowing a little, one more than the other, although the mixture was quite thick and opaque.

Ribbon

We pressed on anyway, despite the lack of stiff peaks, and it turned out fine. I don’t think there was any difference in texture between the two final batches. The process of adding the butter tends to deflate the mixture at first anyway. As long as the mixture is very thick and holds a ribbon, it should still be fine, even without peaks.

Once the meringue is thick, and has cooled to not far above room temperature, you can start to whisk in the butter. The butter should be cubed and a room temperature, so you can easily create an impression in it with your finger, but not so soft it starts to get shiny and greasy.

Whisk in one cube at a time. The mixture will deflate, and become thinner, perhaps quite soupy. It might also split and curdle. Keep whisking and adding butter. Once the butter is almost all incorporated, the texture suddenly changes, and it snaps to a thick mixture, that holds its shape very cleanly.

Untitled

This can be kept in the fridge for several days, or frozen. When chilled, the texture is much like that of butter – quite firm and almost waxy. For this reason, you should make sure cakes frosted with Swiss buttercream are served at room temperature. To bring the the buttercream back to a working consistency, bring it slowly to room temperature, or give a couple of very low power bursts in the microwave, just as you would do when softening butter from the fridge. To help the process along, return the batch to a bowl and use an electric whisk or stand mixer to whip the buttercream until it is soft and spreadable again.

Buttercream in a box

For the final cake, we layered my mum’s 8 inch square sponge layers, flavoured with lemon zest, with most of a jar of bought lemon curd.

Untitled

I trimmed the edges square, and covered the cake with a crumb coat of buttercream. After chilling for about an hour, the cake surface was firm, like a block of cold butter, and we could layer on the rest of the buttercream.

Untitled

Starting at the sides, this task looks a lot like plastering – apply a decent sized blob, and smooth it to an even layer. The great thing about Swiss buttercream is that it can be spread and smoothed out many times, and it will hold its texture. After covering it with a more or less even layer of frosting all over, I used a long palette knife to drag along the sides and over the top to make the surface as smooth and flat as possible. Then the cake went into the fridge overnight.

Untitled

The next morning, we mixed up some fairly thick royal icing with yellow colour paste, and my sister, practiced from many school holidays working in a Thorntons shop, piped 100 on the top of the cake, and scrolls in the corners.

The final touch was to add my mum’s crystallised primroses, made with flowers from her garden, brushed with egg white and dusted with sugar.

Cake

DSC_0268

The final cake went down well – it was moist in the centre, not too sweet. And a fitting cake to bear candles for a 100 year old to blow out.

Untitled

Sugar and spice: Recipes for fruited buns

Hot cross buns, just glazed

In the last post, I talked about shaping buns and rolls. In this one, I thought I would review some of the components of a great fruited bun recipe.

I like buns, I have a stash of home-made hot cross ones in the freezer at the moment, and I think, like Azelia, that you can make them all year around, not just for Easter. All you need to do is leave off the cross, and have them for breakfast, a mid-morning snack, afternoon tea or something to finish the day when you get in late.

Toasted Hot cross buns

Before chemical leaveners, like baking powder and bicarbonate of soda became available, a bit of yeasted bread, perhaps with extra butter and sugar added to it, and some currants thrown in, was what a cake was made of. Eliza Acton’s book ‘Modern Cookery for Private families’ , first published in 1845, featured many more yeast-risen buns and cakes than butter and sugar ones. Before sugar became inexpensive and easy to buy, adding dried fruit to bread was a good way to add sweetness. You can find these ancestors of modern cakes in every part of Britain. The Irish Barm Brack, Welsh Bara Brith and Scotch Black Bun were all based, at least originally, on a yeasted fruit bread. Some of these developed into tea breads and tea bracks, where cold tea was used to soak the fruit, and the whole mixed with flour and an egg to make a soft sliceable loaf.

Most fruit or spiced buns will aim for a soft texture, with a thin, soft crust, and a slightly sweet flavour, complemented by the fruit and spices. Getting a good soft texture can be tricky, especially if you’re used to making bread with thick crusts and open, holey textures.

Here are the important elements for a fruit bun dough that I’ve assembled from advice in a whole series of sources (see References), as well as my experiences.

Untitled

Fat

I used to make bread and discover that although the result seemed pleasing, sometimes the coarse, rustic nature of the bread, with big jagged holes and chewy crumb, wasn’t what I was after. What I needed for those loaves was a little fat. Even just a tablespoon of oil will make a big difference to the softness of the bread. A small amount of fat is needed for fruit buns – butter is good – to keep the crumb soft, and also to make sure it stays soft a little beyond the first day.

You can rub butter or another hard fat into the flour at the start of mixing, or add melted butter or oil with the liquid to the flour. In both cases, the fat will be evenly distributed and will have the effect of coating the flour granules. This gives them a little raincoat, waterproofing them a little so that the water on those granules doesn’t create gluten, or creates less of it. Remember, flour + water + time = gluten.

The effect of this in the finished loaf or roll is to give you a softer crumb, something that feels fluffier. For some reason, it also helps the bread to last after it’s baked, keeping it soft for longer, and delaying staling.

You can also use fat to coat the dough at the shaping stage, giving you separate pieces of pull-apart dough when it is baked. This is what helps to separate the layers in a Chelsea or a cinnamon bun, and what makes monkey bread pull apart. Those streaks of fat prevent the dough from meeting and sticking together, so you still have separate pieces of dough, nestled into each other.

You can see these layers dramatically in the Nordic bakery cinnamon bun.
Cinnamon bun layers

Roux

You can also get the effect of a soft crumb by doing something different to part of the flour: heating it to explode the starch granules. When you make a roux or a white sauce, you heat the flour with butter, then add milk (or stock) and create a thickened sauce. The thickening comes from the starch granules that burst in the heat and swell with the water added to them. This starchy gel can be used, when cooled, as an ingredient to make fluffy white rolls or burger buns. (Dan Lepard has a great recipe that he developed for the Hawksmoor restaurants).

Sugar

Small amounts of sugar will speed the dough along as well as sweetening it, so be careful that it doesn’t over-rise or over-prove, and then collapse. However, larger amounts act to dehydrate the yeast cells, slowing down their growth. For this reason, be careful when adjusting the amount of sugar in a recipe, and keep a careful eye on the dough as it rises – if it over-rises before you can get to it, you may find the yeast is exhausted before it can get to the final rise.

Spice bun dough

Fruit

Dried fruit can absorb moisture from the dough as it rises, drying things out. For this reason, you can soak the fruit overnight first, as Dan Lepard does in his stout buns recipe in ‘Short and Sweet‘. Alternatively, you can increase the liquid in the recipe to compensate. Fruit also adds sweetness, and will not affect the yeast in the same way as sugar added directly to the dough (I think), so it can be a good way to make a sweeter bun without affecting the yeast too much.

Of course, you can always make a fruit bun without fruit – using just spices or perhaps chocolate chips, as they do at Gail’s bakery for their Soho bun.

Gail's Soho bun

Spices

Spices including cinnamon and cloves have an anti-microbial effect, so they will slow down the yeast, by killing off or slowing a proportion of the cells. A long, slow rise before you add the spices can help giving the yeast time to get going. Or the spices can be rippled through when shaping, as they are when making Chelsea buns or cinnamon rolls.

Milk

Milk seems to be beneficial for soft buns, but I can’t really pin down the reasons why. Harold McGee does highlight that scalding the milk and then cooling it before using in the dough helps to destroy an enzyme that would otherwise interfere.
Elizabeth David notes Eliza Acton’s insistence that milk makes a big difference when you want bread or rolls with a thin, soft crust. This effect seems to be mainly due to the fat in the milk.

Some good fruit bun recipes:

Dan Lepard’s Cider Hot Cross Buns

Azelia’s Dairy Free conversion and notes on the same recipe

and if you don’t want fruit you can always try:

Nordic Cinnamon buns from Nordic Bakery

Debs’ Hot Choc Buns

References

  1. Elizabeth David’s English Bread and Yeast Cookery is a comprehensive look at all sorts of breadmaking, covering the role of different ingredients, the history, and lots and lots of recipes.
  2. Dan Lepard, ‘Short and Sweet‘ is full of all sorts of baking recipes and advice, but has good section on sweet breads, including fruit buns, teacakes and sticky buns.
  3. Harold McGee, ‘On Food And Cooking‘ is the bible for finding out exactly what’s happening with your ingredients and recipes

Round and round: making buns and rolls

Spice buns

There are many types of bread that you might want to make into rolls. Enriched doughs can make soft white baps or burger buns. Fruited and spiced doughs can make hot cross buns, teacakes or cinnamon rolls.

Getting neat and even shapes for these things can be tricky. Yeasted dough which has just has its first rise can be puffy and uneven.

Spice bun dough

Going from that lumpy mass to a tray of neat and even shapes can take a little practice.

I recorded some video of making rolls some time ago, and I have now finally got around to editing it together with some instructions to show the steps involved:

In addition to the video, I wrote a few tips that provide some more detail:

  • Make sure you dimple and pat the dough down to remove and redistribute the large air bubbles. You don’t need to ‘punch it down’ as some recipes say, but you do want to make the texture of the dough more even so that you can create even shapes out of it. You can also
  • Use this process to make a symettrical shape out of the dough which will make it easier to divide into even pieces. This can be a rectangle, a round boule shape or a long stick. You can also weigh the pieces as you cut them off to be sure they are even.
  • Try and preserve the skin of the dough when you’re shaping. This is a tip I got from this video of Richard Bertinet with Tim Hayward. The surface of the dough after it has risen is smooth and even. If you can use that surface as the outside edge of all your rolls, it will make it easier to get a smooth surface.
  • Start with this smooth section face down for each piece of dough, and draw the edges into the centre to make a ball.
  • To tighten the surface of the dough and make a really neat round shape, you should rotate the dough on the work surface. This motion (demonstrated in the video) draws the surface of the dough down, stretching it out and tucking it under at the same time.
  • Place the rolls and buns a little distance apart on a baking sheet. When they start to touch, you will know they have risen enough to bake.
  • To get really crusty bread, you should start at a high temperature, and then turn down and bake for longer at a low temperature. With rolls you’re usually after a soft texture and thin crust, so bake at a fairly hot temperature – 200C or so – and don’t overbake or the crust will start to dry out. Little buns might need only 10 minutes; larger burger buns more like 20 minutes.

Untitled

Favourites – April 2012

IMG_1668

A few interesting articles, projects and products I’ve come across recently – you might have already seen some of these if you follow me on twitter or pinterest:

Back soon with a proper post.

IMG_1673

Eliza Acton – Victorian recipe creator

IMG_1481

Never mind Mrs Beeton, Eliza Acton was the real force behind the modernisation and codification of the English Victorian kitchen. In fact, she moans in the preface to the revised version of her book, ‘Modern Cookery for private families’ that many people have been stealing her recipes, and she has taken great pains to note where the recipe is original to the Author, so that people may know these have been stolen from her when they appear in other texts. This is a not-so-oblique reference to Mrs Beeton, and others, who took her recipes for their own text. At more than 600 closely-typed pages, it is a comprehensive work, although unlike Mrs Beeton’s volume, it is restricted to cooking, and doesn’t deal with other areas of household economy like illnesses and servants.

She was among the first to list ingredients separately to the method, and to give reasonably clear instructions of how to make the dishes, without assuming very much previous knowledge of the cook. She apologises that the detailed explanations and observations she has given for each recipe mean that she can’t fit in as many recipes as other books can. Despite this, she fits in hundreds of recipes in the 34 chapters of the book, covering areas as diverse as Forcemeats, Curries, Pickles, Confectionary and Bread. In my calendar of cookbooks for this year, February’s allocation was Eliza Acton’s ‘Modern Cookery for Private Families’, first published in 1845, and reprinted by Quadrille as one of their ‘Classic Voices in Food’. Although one thing and another means I haven’t made anything from it yet, I’ve enjoyed browsing through it, and thought I would share some of my impressions.

Victorians had some funny ideas about health and eating, but Eliza Acton was ahead of her time in many respects. She thought home-prepared food that was nourishing was essential to be productive at work and to build health. She didn’t like the adulteration that was so common in those decades, and thought it important that every household knew how to prepare simple, economical dishes, rather than having to buy them in. She liked French cooking, plain English dishes, Indian curries, Jewish meals and included recipes for them all.

Although the popular caricature of Victorian cooking is a passion for boiling vegetables until they are thoroughly soft to make them more digestible, Eliza Acton does not seem to advocate boiling everything to death. She is often at pains to say that meat should be heated very gently. A recipe for buttered carrots advises that the carrots can be sliced and then boiled, or cooked whole before being sliced – the latter being the slower method, but the one that best preserves the flavour. I am intrigued to try this method.

Lemons are threaded throughout the book’s recipes, often added to butters and sauces, as well as zest being used in forcemeats and wherever breadcrumbs are needed. Likewise, herbs, particularly chopped parsley, are often used in quantity. This gives an impression of a much livelier cuisine that we are used to thinking of. It perhaps also conveys some of the French sensibility which was thought of as the height of sophisticated cuisine, and which Eliza observed first-hand while living in France.

Breadcrumbs are employed all over the place. A delicious sounding recipe for roast chicken calls for the bird to be stuffed with a basic forcemeat (flavoured breadcrumbs), then drizzled with butter and coated with breadcrumbs. This sounds like an early version of crispy fried chicken. She notes that gravy should not be poured over the bird when it is prepared in this way – too right.

Forcemeats play an important role in many recipes. I always thought of these as being based on sausagemeat or pork, but of course, it just means stuffing. The most basic versions in the book contain simply breadcrumbs, lemon zest, butter, and herbs. Some add pounded ham, oysters or mushrooms.

An absence I noted is that there are very few recipes for minced meats. Modern cookery handbooks would lean heavily on the packet of minced beef to produce pies, chillis, pasta sauce and so forth. The only recipe for minced beef appears to be those for ‘collops’, where it is cooked in a little gravy. There is a leftover beef pie, where the cooked meat (“that which is least done is best for the purpose”) is chopped, seasoned, mixed with gravy and topped with an “inch-thick layer of bread-crumbs” moistened with plenty of clarified butter. Sounds pretty good, and not unlike a cottage pie.

Eliza Acton - cakes

The thing I found odd when looking through the text was that there were relatively few recipes for cakes compared to modern texts. Perhaps not too surprising given that sugar was only just becoming affordable for everyday use. There was a major tradition of puddings, and of yeasted buns and breads with dried fruit. But cakes as we think of them don’t have much space devoted to them.

Cakes like fruit cake or Dundee cake that we think of as being very old English recipes are actually more recent. They rely on imported sugar, being produced in Caribbean plantations by slaves, as well as imported dried fruits and spices that would be unloaded at docks like those in London where you can still find traces of those imports in the street names.

A pound cake made with huge quantities of butter and eggs as well as sugar, and with a great deal of manual labour, was a real luxury product. Imagine making a fruit cake where you had to remove seeds and stalks, and wash and dry the raisins. Where you had to break down the sugar loaf into a powder before you could combine it. Where you might want to dry the flour out in a low oven to ensure it wasn’t carrying a lot of water that might throw off the weight. The amount of effort needed, never mind the cost, made sure this was firmly into special treat territory.

I wanted to make some spiced, fruited buns from Eliza Acton, but her recipe is so completely vague, it seemed impossible. In the end, I went instead for Elizabeth David’s in ‘English Bread and Yeast Cookery‘. The results from that are coming in another post soon.

Egg whites, meringues and macarons

Meringue

Updated: now with links updated

You can do so many things with even a small amount of egg white. As they are the best ingredient for capturing air, you can expand even a single egg white into a bowlful of foam. There’s nothing much to egg whites – they are just water plus some proteins. The part that makes them so useful is the properties of the protein. After it has uncoiled a little, it forms a network that traps air bubbles really well.

Keeping egg whites

Very few people outside the catering and restaurant industry seem to know how stable egg whites are. If you separate eggs and use the yolks, you can put the whites into a clean container, cover with cling film and store in the fridge for weeks, even months. You can also freeze them without any problem. Just be sure to defrost them carefully – you can easily cook them by accident if you microwave frozen egg whites!

Working with egg whites

Macarons - 2
There are a lot of legends surrounding egg whites. You do need to keep any fat away from them if you want to whip them up. That means that glass and metal bowls are best – plastic ones aren’t a good idea. Things that help: a little bit of acid works well – a couple of drops of lemon juice, or a pinch of cream of tartar. If you don’t do these things, the egg whites will still increase in volume, but won’t reach quite the same heights of stiff peaks.

Many recipes with whisked egg whites require stiff peaks. If you whisk too far, however, the egg whites will break up into little lumps as you fold them into something else. Both the acid and copper, if you use a copper bowl, will create a stable foam that takes longer to reach this pebbly stage.

When working egg whites into a thick batter, like a cake batter, you can use a portion of the egg whites to loosen the batter first. Just take a large spoonful of the egg whites and stir into the batter without worrying about the air. The liquid in the egg whites will loosen the batter enough to make it easier to fold in the rest and preserve the

Meringues

Adding sugar to egg whites stabilises the foam. Once sugar has been added to a meringue mixture, you can beat it for a long time, and it will just get stiffer. If you’re piping the meringue, or adding other ingredients (such as ground almonds for macarons de Paris), you want the mixture to be as stiff as possible so it will hold up when the other ingredients are mixed in. Meringues can be spooned or piped onto parchment paper for baking.

Meringues are intensely sweet, so it is nice to add a bitter or toasted flavour to contrast with it. Toasted nuts and caramel create complicated, toasted flavours that can make the perception of sweetness less acute, by making it less simple.
Coffee and brown sugar meringues temper the sweetness of white sugar. Adding a thick bland filling based on true buttercream, or perhaps on barely sweetened whipped cream, will also contrast with the sweet meringue.
I like an Alice Medrich recipe that combines dark chocolate, ground in a food processor, with stiff meringue. These are piped in small peaks and baked to give a crisp meringue cookie, with bursts of chocolate flavour.

Macarons

Pistachio macarons
Ms Humble has the best guide to macaron making – in a series of completely comprehensive posts, she goes through every possible hint and tip you could know about. (She also has awesome science cookies posts).
In my own experience, it can be hard to get the ideal shape and texture, but almost every macaron is worth eating, even those that don’t look too beautiful.

Pistachio macarons

You need to make a really thick meringue mixture, so it will hold after folding in the almonds, and while you’re piping. However, too much air will mean a more grainy surface and you won’t get such a smooth skin forming on the surface. You need to dry them a little before they are baked to get that smooth skin. Ms Humble has lots of ideas about the much harder task of getting something that’s crisp on the ouside, soft on the inside, and neither hollow nor sticking to the sheet.

(Below are a pistachio macaron from Alain Ducasse at the Dorchester on the left, and my attempt on the right).

More interiors

Coconut macaroons are much easier – you make a stiff mixture with them, cooking the mixture a little in the saucepan before spooning onto a baking sheet. Here, the sticking power of the protein is much more important than its foaming properties. David Lebovitz has a nice recipe for coconut macaroons.

Stock that’s clear

IMG_3790

It’s very seldom that you achieve the platonic ideal of stock. There is an idea of a clear, golden liquid that conveys many layered savoury depths, and brings a touch of magic wherever you use it,

Reams of cookery writers have written hymns to the power of stock. Anyone trained in the traditions of French cooking, from Joel Robuchon to Michael Ruhlman, will have learnt all about stock as the absolute foundation of French cuisine, the essential component of all meat cookery at least. But even home cooks like Nigella Lawson are converts to this idea.

I fall somewhere in between. I hate food waste, so the idea of extracting every last drop of flavour and nourishment from a chicken carcass really appeals to me. I follow Nigella’s suggestion of freezing chicken bones, and when I have two or three chickens worth, I put them all in a large pot of cold water, bring it to the boil, simmer for about an hour and a half, then add chopped onions, carrots, a stick or two of celery, a few peppercorns and bits of thyme and parsley if I have them around, and simmer for a further hour.

What this produces is fairly flavourful and good for soups and risottos. But it’s not what you think of as beautiful stock – the clear, golden liquid you might see in a consomme or tortellini in brodo.

I know that you should keep stock bubbling very slowly, but the importance of how slow this should be didn’t really sink in until I made ham stock for Heston’s pea and ham soup, using the recipe in Heston Blumenthal at Home. The recipe suggests that you cover the ham with water, add onions, carrots and leeks, bring to a simmer, then place in an 85C oven for 5 hours. This very slow, long cooking produces a liquid that stays well below boiling for the entire duration but still extracts deep flavours.

IMG_3783

When I took the ham out of the oven after this 5 hour stint, the liquid was so clear I could see all the way to the bottom of the pot. It helped that, to ensure the gammon wasn’t too salty, I had brought it to the boil, poured the water away, and then cover it with fresh water to make the stock. This helped remove the scum and bits of floating protein that will always accumulate when you boil raw meat.

A few days later, I rescued the bones from two especially fat pheasants we ate pot-roasted for New Year’s Eve from the freezer, and made stock from them. After the ham experience, I took the lid off, and after bringing it to the boil, kept the heat as low as possible. You can see the cooking in the (rather noisy) video below. It was barely possible to see a single bubble over the course of a minute. The reward for this was a beautiful, clear golden stock. I think this calls for a risotto.

Using stock

To really show off your stock, make risotto – this really captures the flavour you’ve painstakingly brought in. It also makes great soups (although water will almost always do, especially for vegetable soups), provides liquid for curries, gravy, bolognese sauces. If you’re going to make stock regularly (and if you eat roast chicken, it’s not difficult), don’t be precious about it. Use it whenever you see the opportunity. It’s silly to wait for a perfect risotto to use your stock, when you could use it to improve things, even just a little, throughout the week.

Making good stock

  • You don’t need the very best ingredients, but neither should you use only compost materials. Make sure the vegetables are clean, and that most of the skin and fat have been removed from the bones.
  • Stock is all about long and slow. Doing this in the oven is easier, but requires you to have an ovenproof pot with a lid big enough to make this work. Chicken bones want at least two hours, preferably three.
  • Either keep the vegetables in large pieces, and add them at the start, or chop them into chunks and add to the pot with an hour to go.
  • Strain through a fine sieve, or layer of damp cheesecloth to remove any particles. This also means you can add herbs and peppercorns straight to the pot without tieing them into a bundle.
  • Don’t season your stock. You might want to reduce it, so only add salt when you use the stock, not when you make it.
  • Reducing the stock will concentrate the flavour and make it easier to store. After you have strained it, pour back into a clean pot and boil fast to drive off water.
  • Stock freezes really well – it’s the best way to store it. Use either strong freezer bags, or rigid takeaway soup containers. With freezer bags, you can easily get small holes once the bag is frozen, so be sure to defrost it in a container, in case the bag leaks.

Using miso

Shiro miso

Miso is a fermented paste that is an essential part of Japanese cooking, but has also started to show up in recipes for everything from roast pork to soup to butterscotch sauce. I started reading about miso, and then picked up the bag of shiro (white) miso in the picture from The Japan Centre.  If you’ve had miso soup from somewhere like Wagamama, or even Pret, you have an idea of the sort of savoury flavour that comes from miso.

Making miso

While reading up about soy sauce, I came across this interesting idea:

“soy sauce and miso paste were originally the same
preparation, but the liquid became soy sauce, and the solids
left behind became miso”

Miso and soy sauce are both produced by fermentation. Miso can be produced by many different grains, but the most popular types are produced by soybeans with rice and/or barley, and some rice colonised by an Aspergillus fungus, called Koji.

Miso is has both savoury and sweet aspects. Both of these elements come about because the fermentation creates enzymes that break down both the starches and proteins in the soy and rice grains. Breaking down starch produces sugars, (starch is just the name for a long chain of sugar molecules joined together). Breaking down proteins produces amino acids for the same reason. Glutamate is the amino acid which creates the taste of umami.

Cooking with miso

Shiro miso paste

As I read more and more about miso, it became clear that there are a huge number of different types of miso, all with different characteristics. Still, the ones you are most likely to find easily in the UK are shiro miso, or white miso – a pale, fairly sweet miso; and aka miso or red miso, a more savoury and stronger paste. Both of these can be used to make miso soup, by combining them with dashi, a savoury stock made from dried kelp and dried bonito (tuna) flakes.

However, the sweet-savoury nature of miso makes it much more versatile. The current issue of Lucky Peach, an American food quarterly, includes a recipe for burnt miso butterscotch sauce and for miso mayonnaise. (You have to love a magazine that entitles an article on different types of miso paste ‘Miso Horny’. And if you don’t love that, then Lucky Peach is probably not the publication for you.)

You can use it to enhance the flavour of soup, to glaze steak or pork, to marinade salmon, or in salad dressing. It’s a flavour enhancer, which makes it very versatile. I’ll be trying to use more of it this year.

The recipe I started with was Smitten Kitchen’s Carrot and Miso soup. You can head over to her site for the details, but a summary of what I did is below. This is a great way to introduce yourself to miso. The carrot soup is fine without the miso, but with it you get a rounder flavour that brings together the sweet and vegetal tastes of the carrots.

Carrot and miso soup

Carrot and miso soup

  • Chop two small onions, a couple of garlic cloves and about 10 medium carrots.
  • Cook gently in olive oil until the onion is translucent.
  • Add a thumb-sized piece of ginger, chopped finely. Submerge everything in about a litre of Marigold vegetable bouillon (made weak so it’s not too salty). Simmer until the carrots are soft.
  • Blend in the pan with an immersion blender.
  • Take a ladleful of the pureed soup out into a small bowl, and mix in a couple of tablespoons of white miso. As soon as you mix the miso with the hot soup, you get a burst of that miso soup smell. Mix the soup back in and taste. If it needs more miso, repeat this procedure.
  • Serve with a few dots of toasted sesame oil on top.

Eating the soup

Dinner and a movie

The Lounge cinema

Our very first was Tatties and The Wedding Singer. Later came Crouching Tiger, Hidden Dragon, Finding Nemo, Lord of the Rings, every Harry Potter. Dinner and a movie has been part of our date vocabulary forever. The food has sometimes been bad, but chains like Wagamama, Busaba Eathai and Byron Burgers have ameliorated that. More often it has been rushed.

So when I heard about a new venture, allowing you to eat good food in the cinema, I was interested. As it combines Rowley Leigh’s Bayswater restaurant, Le Cafe Anglais, with the Odeon cinema at the other end of Whiteleys shopping centre, I knew we had to try it.

The concept is pretty simple (and they do like to call it a concept). They have converted several screens into luxury cinemas, with wide aisles, reclining leather armchairs, and digital projectors. Outside is a bar and lounge area, where you can order food and drinks from a specially designed menu. The clever part is that you can also order from this same menu once inside the cinema, by pressing an airline-style call button in the arm of your chair. The menu has been designed in ‘finger’ and ‘fork’ sections, so there’s no need for a lap tray or knife and fork.

We ordered drinks in the bar, and attempted to order food before being told that if we ordered in the bar, it would arrive there. If we wanted food served in the cinema, we should wait and order inside. This we did, and after having the ‘concept’ explained, and playing with the chairs a bit, we ordered a porchetta sandwich with fennel and apple, a side of chips, a venison chilli, and a lemon tart for afters.

These arrived towards the end of the trailers, and were very good. The porchetta sandwich was savoury, and came with a strip of crisp crackling, though the salty pork and mayonnaise rather drowned out any fennel and apple. Some crisp cabbage might have improved it. The chips were crisp and brown and the venison chilli was pronounced good, but rich. The lemon tart was smooth and delicious, though the firm shortbread base made it hard to tackle quietly, and it came with yet more crispy bits – shreds of lemon peel.

All of this is obviously not cheap. A cinema ticket is £18, whilst menu items range from £7.50 for penne with broccoli to £14.50 for the ‘Royale’ – a beef fillet in a bun. We paid £45 in all, including £10 for drinks.

However, when compared with the real competition, it’s not at all bad either. Le Cafe Anglais is a very fine restaurant, and the two-course set menu is £20 per head. The Electric Cinema, just up the road in Notting Hill, has leather chairs as well, and a bar at the back, and charges £15 per ticket (or £32 for a two seater sofa). Vue have ‘luxury’ cinema options as well: Scene, with its own bar, comes in at £17.15 at Westfield.

There are niggles. My porchetta was somewhat over-salted. Deep-fried tortilla bowls, crisp chips and firm shortbread bases for tarts all seem foolish things to serve in a cinema where they will crunch, or you will need to use implements to tackle them. They don’t quite have the service worked out yet – it should really be possible to transfer your drinks tab to your seat in the cinema, instead of settling up twice.

But anywhere that offers huge, reclining seats, good food, and the luxury of taking your time to eat it, gets my vote as a date destination.