Pistachio gelato

Pistachio gelato

I tend not to buy completely unknown ingredients – my cupboards are too full for that. But if something rings little bells of recipes I have seen before, then I’ll pick it up, and work out what to do with it later.

I like discovering new ingredients in this way. They present a new frontier of challenges, a new coastline to be explored. They give me a starting point to wander through my cookbooks and discover new things. (And have I mentioned how brilliant Eat Your Books is for this? This indexing service does what I have never had time to do: provides a list of all the recipes in cookbooks and magazines, along with a listing of the ingredients in them, so you can search through all your book indexes at once).

So when I was browsing for Christmas presents in Gelupo, a gelateria in Soho that is the sister location to Italian restaurant Bocca di Lupo, and spotted pistachio paste, I bought it without knowing how I would use it.

Pistachio paste

I’ve come across recipes asking for pistachio paste in the past. It’s like a pistachio version of smooth peanut butter, and has that nutty flavour and sticks to your palate in the same way. It is often used in professional recipes because it is so smooth, and because it provides a concentrated pistachio flavour.

Although the Gelupo staff seemed convinced that the pistachio paste wouldnt go off, I know that nut oils can go rancid quite fast, so I opted to store it in the fridge. And there it sat over Christmas while I wondered what to do with it. I thought about pistachio cakes and biscuits, where that bright green colour could really be shown off.

In the meantime, I got the Bocca cookbook for Christmas. And, of course, the answer I was looking for was pistachio gelato.

Pistachio has been my favourite ice cream flavour for ages. When on holiday in France as a child, I would usually order a double cone with one scoop of chocolate and one of pistachio (either that or coffee and chocolate). I even tried to make pistachio ice cream at home when I was 12 or 13. The results, using nuts whirled in a not particularly powerful food processor, were predictably grainy. There was still a whisper of the right flavour there though.

Gelato is something that you mainly see in Italy and the US. Whereas ice cream is properly made with cream and thickened into a custard with egg yolks, gelato is made with milk, and instead of being thickened with eggs, it uses either gelatin, or cornflour or both to thicken the mixture. Gelato fans say that the lower fat content and no eggs allows the flavour of the gelato to be less obscured than that of ice cream. Explaining its appeal in the Bocca cookbook, Jacob Kenedy says: “a flawless representation, like that of Dorian Grey, the picture is so perfect it steals its subject’s soul”.

What’s missing from the recipe

Following the theme of my last post, I wanted to look in more detail at this recipe, and why it works the way it does. The recipe asks you to make a ‘base bianca’ first, with milk, cream, sugar, honey or glucose, and milk powder. This is then heated and gelatin stirred in to dissolve before chilling it. Finally, more sugar and the nut paste are whisked in before churning it in an ice-cream maker.

It took me a while to understand the reason for some of the instructions in the recipe. It instructs you to remove it from the heat “when the mixture approaches a simmer”. Apart from being a very unhelpful instruction (how do you know it’s approaching a simmer until after it’s simmering?), was there a reason for needing to heat to a specific (unnamed) temperature, rather than just enough to dissolve the sugar and milk powder?

I remembered that I had read about the need to scald milk for bread making, to destroy proteins, and wondered if the purpose was similar. In Shirley Corriher’s food science book ‘Cookwise’, she explains in the Ice Cream section that:

“one step is essential for optimum smoothness if using any milk or half-and-half in the recipe. The milk or half-and-half should be heated to 175F (79C), just below scalding. I do not know the exact nature of the changes that this heating causes – perhaps denaturing or partial coagulation of some of the proteins. Whatever it is, the effect is a noticeably smoother texture in the ice-cream.”

Further clues are given by Harold McGee when explaining commercial ice-cream making:

“If carried out at a high enough temperature (above 170F/76C), cooking can improve the body and smoothness of the ice cream by denaturing the whey proteins, which helps minimize the size of the ice crystals.”

This recipe in fact contains three magic elements to make it smooth and creamy:

  1. the heated milk denatures the whey proteins, adding proteins to interfere with ice crystals
  2. the gelatin acts as a stabiliser, adding yet more protein, both thickening the final result, and interfering with ice crystals forming
  3. the honey or liquid glucose, which lowers the freezing point, and produces a softer texture at a given temperature. All sugars lower the freezing point of water below 0C. This site explains that the smaller the sugar molecule, the better it is at lowering the freezing point. Little glucose is much better than sucrose (table sugar) because it is half the size, sucrose being made of one glucose and one fructose molecule stuck together. Azelia has written much more about using liquid glucose in ice-cream.

The whole mixture is much more liquid than a normal ice cream base when chilled, with barely a hint of thickening from the gelatin.  But the final result is silky smooth, and much more scoopable than a traditional custard ice-cream.

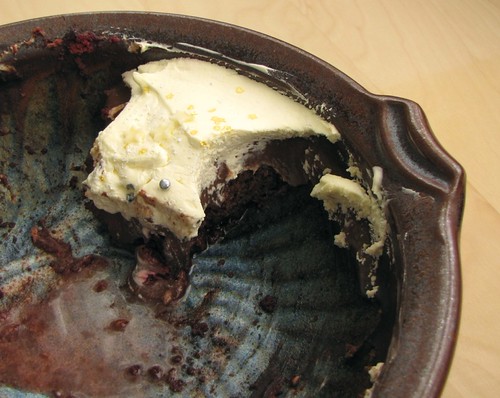
Recipe: Pistachio Gelato

(adapted from Bocca by Jacob Kenedy)

I have tweaked this a little to suit the ingredients I had on hand, using semi-skimmed milk and double cream in place of whole milk with whipping cream. Gelatin can usually be found in the baking aisles – I used a Supercook brand, which comes in packets of 12 small sheets. I have also seen agar agar in some supermarkets – this is the one to choose if you are vegetarian.

Base:

  • 480ml semi-skimmed milk
  • 160g double cream
  • 40g glucose syrup or light honey (I used orange blossom)
  • 130g caster sugar
  • 40g skimmed milk powder
  • 3g leaf gelatine (2 small sheets) or 4 teaspoons agar-agar

Gelato:

  • 85g pistachio paste
  • 45g icing sugar

To make the base: heat the milk, cream and honey in a heavy pan until steaming. Meanwhile, mix the caster sugar with the milk powder in a small bowl. Pour into the warm milk in a stream, while whisking to prevent lumps forming. Bloom the gelatin sheets in a bowl of cold water, and continue to heat the milk. When the mixture is almost simmering, with bubbles around the edge of the pan, remove from the heat and stir in the gelatin. If using agar-agar, sprinkle it over the surface and leave for 5 minutes to swell and ‘bloom’ before stirring in.

Remove the base to a bowl to cool, then chill. When you’re ready to make the ice cream, whisk in the pistachio paste and icing sugar (I did this by hand, but a blender or hand-blender would probably do a more thorough job). Churn in an ice-cream machine, then turn into a container and freeze.

Gelupo

7 Archer Street, Soho, London, W1D 7AU

If you’re ever in London, near Piccadilly Circus, I highly recommend a visit to Gelupo. They serve Italian gelato, as well as sorbets and granitas. They always have new seasonal flavours in, as well as classic Italian flavours that you don’t often see here, like Stracciatella and coffee granita. The fruit flavours are vibrant and clear. You can also pick up little treats like handmade almond biscuits.

Chocolate raspberry trifle – and a dessert wardrobe

Inside the trifle

Sometimes a dessert comes together that you know is a keeper. If you’re lucky, you know it will be good beforehand, and get all the benefit of the anticipation as well. And sometimes, just the name is enough.

I needed a dessert for lunch on New Year’s Day. It had to suit both adults and kids, and be prepared ahead, to make it easy on the day. Browsing through Nigella for ideas, I hit on trifle. Trifle is a very Christmassy dish – all that custard and cream fits with the excesses of  late December. And because it’s best served in a single bowl, it really needs a decent sized group before it’s worth making. It is indeed something to feast upon.

The original plan was to make Nigella’s Chocolate cherry trifle, but this version really started with the arrival of a bottle of Chambord (black raspberry liqueur) as a Christmas present. I had never tasted it before (and, like all fruit liqueurs, it does have a hint of Benilyn cough syrup about it), but it sparked the idea of a chocolate raspberry trifle, instead of a chocolate cherry one. And I love the combination of chocolate and raspberries – the sharpness of the raspberries is a great match for chocolate.

I had frozen raspberries, and also some shreds of flourless chocolate cake bagged up in the freezer. It did not carry good karma with it – it crumbled as I tried to unroll it as a roulade on one of those days when a bad work day, and a dropped carton of double cream make that the final straw. But I knew it tasted good.

All that was needed to make was the chocolate custard. Although Nigella suggested you make sandwiches of chocolate cake and jam, that wasn’t going to be an option with the delicate flourless cake I had (not least because it was in so many fragments). So instead I thinned the jam with a splash of water into a syrup that could be used to douse the cake.

This was an example of the ‘capsule wardrobe’ approach to dessert making: if you have great components, then you can assemble them in many combinations, and be confident about the result. This is the exception to the rule that you shouldn’t make something for the first time for guests. If you’ve made all the component recipes before, then you can be much more confident that the final result will work.

I’ve stolen this idea from Alice Medrich, who has a section in her book ‘Bittersweet‘ called ‘Basic Wardrobe for Designing Desserts’. This includes recipes for basic cake layers, mouses, fillings, frostings, glazes and decorations that can be put together in different combinations.

In making this trifle, I did what I so seldom do, and tasted everything, every component. When I am following someone else’s recipe, I sometimes assume that if I follow everything to the letter, I don’t need to taste as I go. And if it doesn’t work out, I can just shrug and blame the recipe writer. But recipes don’t work like that, and we can’t help ourselves get it right unless we taste things.

Some of this dish’s success was serendipity, but there was also a set of learned and ingrained thoughts at work. I knew that the flourless cake was light and moussy, so would match the density of the custard and whipped cream well. Having tasted the custard and syrup, they were both sweet, so I knew I needed the raspberries to be quite densely packed to provide contrast.

I’m really pleased with the result, and I’ll even go to the trouble of crumbling that cake deliberately now I know how good it can be in a new incarnation.

A teacup trifle

Recipe: Chocolate raspberry trifle

Serves 6-8

For the cake (this is Smitten Kitchen’s Heavenly Chocolate Cake Roll):

  • 170g dark chocolate, chopped
  • 3 tablespoons strong coffee
  • 6 large eggs, at room temperature
  • 150g caster sugar
  • 1/4 teaspoon salt
  • 2 tablespoons cocoa

For the chocolate custard (adapted from Nigella Lawson’s Chocolate Cherry Trifle recipe in ‘Feast‘):

  • 50g dark chocolate (64% Chocolate by Trish buttons)
  • 175ml semi-skimmed milk
  • 175ml double cream
  • 4 egg yolks
  • 65g caster sugar
  • 20g cocoa
To finish:
  • 300 ml double cream
  • 350g frozen or fresh raspberries
  • approximately 100g seedless raspberry jam
  • 3 tablespoons Chambord raspberry liqueur (optional)
  • Silver balls, stars, chocolate curls or other decorations

Make the Heavenly Chocolate Cake Roll as directed on Smitten Kitchen. You can use another sort of chocolate cake, although this one proved perfect for trifle – partly because I was unable to make it roll up (I left it to cool for too long), and so it crumbled to shreds and ended up in the freezer. But the soft, light texture made a good base for the trifle, without being heavy.

For the custard:

Melt the chocolate gently over a pan of hot water or in the microwave. Set aside. Whisk the yolks, sugar and cocoa together in a large bowl with a pinch of salt.

Heat the milk and cream together until little bubbles appear at the edge of the saucepan. Pour the hot milk and cream over the egg yolk mixture while whisking. Once everything is mixed together, scrape it all back into the saucepan. Heat gently to thicken the custard, stirring constantly and scraping the bottom with a wooden spoon. You need to take it until a thick, shiny layer appears on the back of the spoon. Once it has thickened, scrape into a bowl, cover with clingfilm in touch with the surface and chill for several hours.

Make the syrup: Warm the raspberry jam with a splash of water and about 8 frozen raspberries until the jam melts and the raspberries collapse. Remove from the heat and stir in about 3 tablespoons of Chambord (black raspberry liqueur).

Finally, assemble the trifle:

Line a dish with the chocolate roll cake, pushing the pieces together to make a single layer. Soak with the raspberry syrup. Cover the surface with the remaining raspberries, partially pressing them into the cake. Cover with the chilled chocolate custard and smooth into a single layer. Cover with clingfilm and chill for several hours or overnight.

An hour or two before serving, whip the rest of the double cream (about 300ml) to very soft peaks, and spread over the custard (whipped cream thickens more and more every time you spread it, so whip it very softly, and spread it out with as few movements as possible). Decorate with silver balls, gold stars or chocolate shavings. I used edible gold stars from here.

End of the trifle

Raspberry Truffles

Every year I make elaborate plans for all the biscuits, cakes and other food presents I will make for friends and family at Christmas. And every year, my ambition exceeds the time available, after I’ve accounted for time to buy presents, go to parties and travel to see family. I usually end up with some sort of cooking marathon or a couple of evenings where I’m in the kitchen until midnight, wrapping caramels or dipping orangettes or whatever I decided was a good idea this year.

For 2010, I made brownies (obviously), chocolate balsamic vinegar (which not everyone was wild about, but was worth it just for me), mini chocolate walnut cookies and … homemade chocolates. I made raspberry truffles, described below, but I also made Azelia’s caramel truffles, which were amazing and easier to work with (I increased the proportion of chocolate to make the centres a little easier to dip). I definitely recommend trying that recipe, and as a great side effect, you get to make Dulce de Leche.

As I noted in my 2010 review, this was something of a year of chocolate. I went to demos, tried tempering again, and generally immersed myself in the world of UK fine chocolate.

Probably the most surprising chocolate recipe I came across was the raspberry ganache recipe I made at Divertimenti with William Curley. It is made only of raspberry puree and melted chocolate, but tastes creamy, and yet with such pure fruit flavour. It’s also so easy and impressive to make for other people.

About ganache

Ganache is usually described as an emulsion of chocolate and cream. This is used to make chocolate truffles, but also often used as a simple, sophisticated chocolate icing for cakes, a filling for a chocolate tart or a starting point for chocolate caramels.

However, a ganache can also be made with water or something water-based like a fruit puree (after all, cream is mostly water, even if the rest is fat).

Truffles

The simplest way to make a truffle that I know is to heat cream, pour it over finely chopped chocolate, stir until you get a smooth ganache, and then pour into a foil-lined square tin. Leave until set, preferably overnight, refrigerate (or freeze if it’s a very soft mixture) and then cut into 1 inch squares.

I saw this simple method demonstrated by Alice Medrich, and it was a revelation. She made mint chocolates, by infusing the cold cream overnight in the fridge with a bunch of chopped fresh mint, straining it out, then heating the cream. It avoids the need to scoop or roll little balls, and if you’re eating them fairly quickly, you can just set out the squares on a plate and hand them around.

I made some of the raspberry ganache this way in the summer, and just coated the squares lightly in cocoa, and then kept them in an airtight container in the fridge.

But for sending gifts, I needed something more robust and more long lasting – and that means a chocolate coating for the truffles.

Tempering

Tempering chocolate is a tricky enterprise and always, always ends up with you, the kitchen, and a range of utensils coated in a layer of chocolate. But it is what gives you that lovely shiny, snap on chocolate, that crisp crack as you bite into it.

Chocolate is a really complicated material. It consists of cocoa butter, cocoa solids (the cocoa powder) and sugar (or at least the good stuff does). But cocoa butter is a very complicated fat, having seven different types of crystals it can form. I’m not going to go into huge detail about the mechanism for tempering here, as Katie has done a much better job over on her blog, so go look there. She also has a great primer on truffles. And you can buy her lovely tea-flavoured chocolates here.

The short version of tempering is to heat the chocolate to melt all the fat crystals thoroughly, melting it quite hot, then cool it in a controlled way to the temperature where the ‘good’ fat crystals form, which is below body temperature, and when the chocolate is quite thick. FInally you heat it very slightly again, so it’s thin enough to work with, but not so hot that the crystals all melt out again.

Recipe: Raspberry truffles

  • 320g raspberry puree
  • 320g chocolate
  • 50g softened butter
  • 1 tbsp vodka

This makes a huge amount, enough to pour into an 8 inch square pan or even larger. You can certainly make half this quantity or even less. And this also gives you less work to do when dipping them.

I made the raspberry puree at the end of the summer, with fresh raspberries that were on special offer at the supermarket, close to their expiration date. It doesn’t matter if they are a bit soft and bruised, but they shouldn’t be mouldy. I heaped them in a pan with a tablespoon or two of water, and heated it with a lid on to break down the berries and release the juice a little bit, but didn’t bring it quite to the boil. I then pureed with a hand blender and passed it through a fine sieve to remove the seeds. I then froze the puree until Christmas.

To make the ganache, heat the raspberry puree until warm but not boiling. Taste it, and if it is very acidic, sweeten it a little with some icing sugar. You want the bright, fresh fruit flavour, but too much acid combined with the bitter of the chocolate may be too astringent. It’s up to you how much you sweeten it.

Melt the chocolate in the microwave, in short bursts, until it’s barely melted. Stir to melt the remaining pieces until it’s just smooth. Add the raspberry puree and stir until it is completely smooth.

Stir in the softened butter, and the vodka if using,  until completely combined. The vodka is optional, but helps to preserve the ganache a little longer.

Pour and scrape the ganache into a 7 inch or so square tin, lined with foil or baking parchment. Tap on the kitchen counter quite firmly to make sure that any air bubbles are expelled. Leave at room temperature to set, then put into the freezer. This is a very soft ganache, so you will need to freeze it in order to cut it easily. Alternatively, you can add more chocolate to the recipe to make it firmer and easier to handle.

Once you have cut the ganache into one inch squares, it is a good idea to leave them to cure for a while in the fridge. This seems to set the outside of the truffles, making them firmer and easier to dip.

You then need to take them one by one, dip them quickly in the tempered chocolate, and then tap to remove excess chocolate before putting onto parchment. As this is a very soft ganache, you need to do this fast, so that the ganache doesn’t start to melt into the chocolate or stick to your fingers too much.

Once the truffles are set, you should store them in a cool place in a sealed container. Storing them in the fridge will make them last longer, but you need to make sure they don’t get wet from the condensation, and allow them to come to room temperature before eating them. You can also wrap them in individual squares of foil, to make them look like Quality Street (as my sister described them)! I ordered mine from the Cakes Cookies & Crafts Shop.

There’s something about pastry

Edd Kimber, a.k.a. @theboywhobakes linked to this article on twitter not once, but twice – and I’m very glad he did. It’s a fascinating article from the New Yorker about the evolution of the modern dessert, a “quest to find out what desserts really [are] and where they [are] going”.

It’s a great read, although leaves you wanting more detail in a number of places. However, I found the distinction between dessert and not dessert somewhat false. As the article describes, the line between the two is quite blurred, because the techniques straddle dessert and main course cooking, and sweet and savoury flavours can appear in both. Ultimately, the only good definition of dessert is that it comes at the end of the meal.

But for me, the more interesting separation is not about dessert, but about pastry. I found the most interesting part of the article Ferran Adria’s description of the two major revolutions in French cooking coming from chefs originally trained in pastry – Carême codifying French cuisine and Michel Guérard and nouvelle cuisine. I’ve always found it interesting that Gordon Ramsay trained in pastry as well, and his Just Desserts book is, I think, one of his better ones. Pastry, in this context means a set of techniques in manipulating flour, sugar, butter and eggs to create a set of new materials – a set of skills which perhaps can equip you to imagine a new type of cuisine.

I definitely prefer pastry, mostly baking, to cooking – something that’s very obvious from the archives of this blog. It is something that I have thought of as a bit of defect, and have tried to correct (at least on the blog). I have thought of myself as  preferring pastry because I have a sweet tooth, and when I was at cooking school, because it was a calmer task than line cooking. These preferences are part of it, but this article also starts to get at something else which marks pastry apart from the rest of cooking. It is learning the techniques you need, and understanding the science behind the transformations in baking that really fascinates me, and draws me back to repeat, refine, adapt and develop.

The idea of constructing something new – creating new textures and materials out of raw ingredients – is fascinating. This is what Alice Medrich calls ‘a basic wardrobe for designing desserts’ and the part that appeals to ‘the engineer and architect’ in her. Armed with these techniques, and the ratios that make them work, you can create anything you care to dream up.  And because these are confections, they lend themselves to imagination and creativity. There’s no ‘meat and two veg’ target to hit, no nutritional points to count, no need for ‘food as fuel’. It is pure escape, like couture, the concept car or the Turner prize. (High end dining occupies a similar place, regardless of the courses.)

Something I’ve done before is to map out techniques or recipes, to see how learning one can lead you on to the next. This seems to work particularly well for pastry, where the same few ingredients can be combined in a huge number of different ways.

This diagram is an illustration of where these techniques can take you. A diagram of how to navigate the materials and techniques, and what you can access with each of them. This is a start – I would like to develop this further. If you can see anything that’s missing, or have any good ideas on how it could be used or developed, please let me know.

What about you – do you prefer pastry or cookery – and do you know why?

Making chocolate caramels

Chocolate caramels on Flickr

Buying a sugar thermometer seems like the sort of thing only crazy people do. It seems to sit along deep fat fryers and foam-generating siphons as the sort of equipment only professionals and obsessives really need.

The crucial thing about a sugar thermometer is that it allows you to measure a very simple property – the concentration of sugar in a syrup. That’s it.

Water  boils at 100°C (at sea level), and adding sugar to the water raises the boiling point up and up. Caramel is just very hot sugar, that has started to develop complex flavours, a little like browning meat. So a sugar thermometer makes caramel as well as jam a much more predictable affair, and removes much of the guesswork. I have both a glass thermometer, and a new and shiny digital thermopen. If using a glass one, be careful that you have enough liquid to immerse to the line it indicates, or the temperature won’t be accurate. You also need to make sure you put the thermometer in the pan early on – adding a cold thermometer to boiling caramel is a recipe for broken glass in your caramel. A good idea would be to warm the thermometer in the cream, then put into the caramel mixture once the cream is mixed in.

I like making caramel, because the ingredients are so simple and cheap: sugar, butter, cream – but the results are so complex in flavour. Depending on how long you cook this, and to what temperature, you can have a caramel sauce, soft, chewy caramels or hard toffee. I prefer a fairly soft caramel, that is still firm enough to slice and wrap.

These chocolate caramels are a beautiful combination of the buttery flavour of caramel with dark chocolate to balance the sweetness. I was surprised that the recipe asks you to cook the caramel with the chocolate in to a high temperature – I expected the chocolate to burn. I stirred fairly frequently to make sure it didn’t catch on the bottom of the pan, and there was no trace of burnt flavour in the caramel, so I guess it worked.

For more on regular caramels (without the chocolate), Dan Lepard has a great all-purpose caramel recipe he wrote for the Guardian a while back.

Salted chocolate caramels

Adapted from Smitten Kitchen, who in turn, adapted from Gourmet

Usually I would list the ingredients as I go, but it’s especially important to have everything prepared in advance for caramel making, so I have separated the preparation and cooking stages.

Preparation:

Line an 8 inch square pan with foil or two strips of baking parchment at right angles. If using foil, brush with a thin coating of vegetable oil. Set aside.

Chop:

150g dark chocolate

into small pieces and put into a heatproof bowl.

Place

240ml double cream

into a small pan.

200g granulated sugar

Put into a thick-bottomed pan, something quite tall as it will bubble up later (use your best pan for the sugar, and second best for the cream)

Measure out:

60g golden syrup

and

30g butter

and

1/2 tsp coarse sea salt, crushed into fairly small crystals

(this is optional, but very good. Maldon salt or fleur de sel is good. Table salt is not – it will be far too salty).

and put aside, near the stove.

Cooking:

Heat the cream until tiny bubbles start to form at the edge of the pan

Pour immediately over the chocolate, and stir gently until the chocolate is completely melted and the whole thing is smooth.

Add a tablespoon of water to the sugar in the pan, just enough to make it a little damp, and put over medium heat until the sugar dissolves. Keeping a lid on will help it heat faster, and make sure that the sugar gets dissolved properly. Once it is all clear and liquid, remove the lid, turn the heat up to high and boil furiously to make caramel. You want to bring it to a fairly dark amber, without burning it. When it starts to become golden, turn the heat down a little so you can control the process a little better.

Remove from the heat and add the golden syrup, and then, gradually,  the chocolate and cream ganache. Stir after each addition. It will bubble up furiously as the water in the cream is liberated to steam all at once – the caramel will be much hotter than the boiling point of water.

Once everything is combined, return to the heat with a sugar thermometer and bring to the boil again. Heat until the temperature reaches 255F/124C. Any lower, and you risk a pourable, liquid caramel (although if you want caramel sauce, that’s fine). You can take it higher, and get a firmer caramel, until it starts to become toffee.

Immediately remove from the heat, stir in the butter and the salt if using. Stir to incorporate the butter thoroughly, then pour into the prepared tin, and leave to cool and set.

Once completely cold, lift the caramel out of the pan with the paper or foil, and turn upside-down onto a cutting board. Use a large knife to slice into strips and then squares. Wrap each piece in a square of baking parchment or greaseproof paper. Or just eat quickly 🙂

Store in a sealed container – exposure to the air will allow the caramel to absorb water from the air, and it will start to become too sticky.

Periodic Table of Desserts

Via Bob del Grosso at Michael Ruhlman’s blog comes this gem:

Periodic Table of Desserts

“You’ve seen those charts that say, like, “Periodic Table of the Vegetables” or “Periodic Table of the Sausages”?
They annoy me. Because they’re not periodic. They have no vertical or horizontal correspondences. The actual periodic table of chemical elements has structure — that’s why it’s cool.

As Bob’s post says, this is very cool – the exact poster that inspired this effort hangs in Tante Marie’s cooking school, above the Pastry table in the back, and looking at it used to annoy me too! The thing is, cooking is about science and structure, so why take an important diagram like the Periodic Table and put some unstructured information into it!
I think this is brilliant – I may even order the poster