Candied peel – why it works

Seville oranges

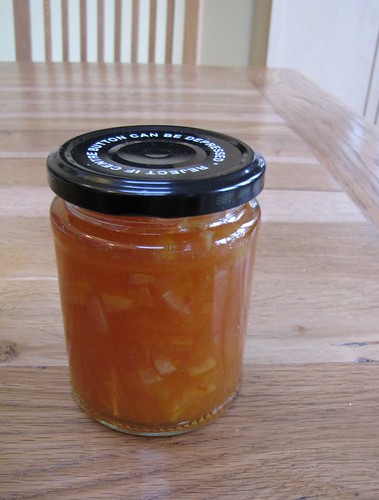
Whenever I make marmalade, the huge piles of wasted peel get me down. While I like the taste of orange peel, i dont like my marmalade to be jam packed with it, so I tend to include only some of the peel in the preserve. But those shiny, bright orange skins disappearing into the food waste bin is such a sad sight. Its only the exhaustion induced by the particularly time consuming method of marmalade production that leads me to discard these skins. Because instead, I could be making candied peel – and this is what I did this time.

But what is it that turns orange peel into candied peel successfully? All the recipes say different things, even though it’s a very simple recipe. The idea is to remove some of the bitterness that makes orange peel unpleasant to eat raw, soften it so you can bite through easily, and then steep in sugar syrup to sweeten and preserve it, without causing the sugar to recrystallise.

Candied orange peel

The problem is that hardly any of the recipes explain why they have the steps they do. Not understanding what’s going on really annoys me. If I don’t know the purpose of each step, then it’s much harder for me to work out when each stage is done, or to spot if something has gone wrong.

And this is a baking-type recipe – it should be precise – but when all the recipes disagree slightly, how do you know which one to follow?

In the case of the candied peel, the basic steps are:
1. Remove the peel, either by scoring the entire peel, or by peeling just the zest with a peeler (if you do that, there generally isn’t a requirement to blanch it).
2. Blanch the peel – in anything from 1–5 changes of water. (Sometimes, boil the peel until tender) as well.
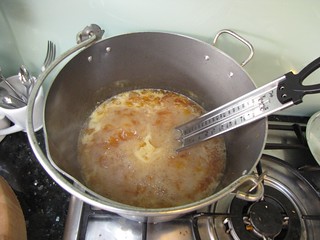
3. Immerse in sugar and water, anything from 1:1 ratio to 2 parts sugar to 1 part water. This might also include some corn syrup, or some cream of tartar. Boil for anything from 30 minutes to 2 hours.
4. Put out on a rack to drain. Roll in sugar straight away or leave out to dry for a day or several days.

That’s a lot of variation for very few steps of instruction. Obviously, you’re dealing with two big uncertainties: a natural product, the orange, that can be sweet or bitter, thick-skinned or thin skinned; there’s also another uncertainty that is acknowledged in recipes much less often: your individual palate. Relatively few recipe writers encourage you to taste as you go and then adjust suit what you would prefer. Do you quite like the bitter tang of orange peel or do you have a sweeter tooth? Are you planning to use this peel in recipes where the sour contrast is going to be appreciated, or would you like to eat these with chocolate where you want things a bit sweeter?

The first part, the blanching is there primarily to remove the bitterness from the pith – or at least moderate it. Harold McGee explains:

“The outer epidermis contains the aromatic oil glands while the spongy, pectin-rich
albedo usually contains protective bitter phenolic substances. Both the oil with its
terpenes and the antioxidant phenolics are valuable phytochemicals. The bitters are
water-soluble, while the oils are not. Cooks can therefore leach the peel repeatedly
with hot (rapid) or cold (slow) water to remove the bitter compounds, then gently
cook the peel if still necessary to soften the albedo, and finally infuse it with a
concentrated sugar syrup. Through all the processing, the water-insoluble oils stay
largely in the rind.” – from ‘On Food and Cooking’

So blanching the orange peel makes it edible by removing the bitter compounds and softening the pectin. This means you should be able to taste it, and test the softness, to determine how many times you want to blanch the peel.

When you infuse it with sugar syrup to preserve it, you are trying to reach a certain concentration of sugar, and this is most easily measured with the boiling temperature of the syrup. As you boil a sugar syrup, the temperature increases as the amount of water decreases, and the sugar gets more concentrated – this is essentially what a sugar thermometer is measuring. At a boiling point of 230 degrees F / 110C you get to about 80% concentration of sugar. This is a good level for candied fruit. If you stop at a lower level, there is a risk of crystallisation, as well as a risk that the peels will remain too sticky and not keep well. This also means that it doesn’t matter too much what ratio of sugar to water you start out with – except that a weaker solution will take longer to reach the right concentration, meaning that the peel will be submerged for longer, and this can help make sure that the syrup penetrates all the way through properly, especially with thick pieces of peel.

Candied orange peel
Traditional candying processes for whole fruits – for cherries, tangerines, melon in places like France – require the fruit to be cooked in increasingly concentrated syrups over many days. This allows the sugar to penetrate into the thick fruit and ensures that the water is displaced.

Adding cream of tartar (an acid) along with the sugar helps to prevent crystallisation of the sugar in the final peels. The acid helps encourage the sucrose in the granulated sugar to break down into glucose and fructose, its two smaller units. These get in the way of the sucrose reforming nice neat sugar crystals. Adding corn syrup does a similar job – it already has glucose and fructose in it, so they also help interfere with crystallisation.

The peel should cook for a good long time in the syrup – 45 minutes to 2 hours is the general guidance. Slow is good, to make sure the peel is well infused. Then remove the peel from the syrup and spread onto a cooling rack to dry a little, and become tacky rather than sticky to the touch. Then you can roll in sugar, or dip in chocolate, as you prefer.

Links:

June Taylor and Martha Stewart making candied Meyer lemon peel – recipe and video

Smitten Kitchen making orangettes

Candied ginger, candied lemon peels, and science

Seville orange marmalade

Untitled

I have made marmalade a number of times, with some notable successes as well as notable failures. I have had everything from a dark brown orange syrup to a set so thick you could bounce things off it. No one seems to have the same recipe, and several of them flat-out contradict each other. Nigel Slater, in the Kitchen Diaries II, at least acknowledges that every marmalade maker has their own peculiarities and that none of them can agree.

Marmalade making requires getting three things right: enough pectin in the mixture to create a gel; a balance of sugar, acid and pectin that will enable the gel to set at room temperature; and cooking the peel through enough to make it edible and not too chewy. There are a huge number of routes that you can take to get to this end result, and most regular marmalade-makers will have a preferred route, as well as desired result. Some are aiming for a tawny, caramel-tinged, dark marmalade with hearty chunks; others a light, clear jelly with threads of peel through it.

My real conversion to marmalade making was discovering June Taylor’s approach. Although recipes from her are frustratingly hard to track down, her handmade approach and attention to detail have produced stellar results when I have tried them – a softly set bright orange jelly with an amazing fresh flavour. This comes (I think) from a much lower-than-normal amount of sugar in her recipes, as well as a time consuming process which involves segmenting the fruit, and removing the membranes into a bag with the pips, so they can contribute pectin, but not cloud the jelly.

With marmalade, you have to balance the simplicity of making it with your satisfaction with the end result. How far are you willing to go? If you’re ready to make your own marmalade, we can safely assume you’re willing to go quite a long way, but segmenting each orange is a very different amount of active effort needed, compared to boiling the fruit whole and then chopping it all up. But for me, it comes down to how happy I will be with the end result. I am almost incapable of throwing away food that I have spent large chunks or time or money preparing, so if I end up with 5 jars of not-very-good marmalade, I know from experience that they will sit in the cupboard for a long, long time while I reluctantly work my way through them. If they are not great, I won’t want to give them away either, making their stay in the cupboard even longer.

I would rather spend an extra half hour on preparation to end up with a sparkling result that I’m incredibly proud of and can’t wait to share with other people. That, to me, is a much better reward for my time than a few jars of dark and muddy orange-flavoured jam.

Having tried a tangerine and grapefruit recipe before, with good results, I decided to try and work out what a June Taylor-style Seville orange marmalade recipe might look like. This was a tricky task, as she doesn’t make Seville orange marmalade at all – it’s one of very few citrus fruits that you never see in California. So I read through quite a few alternative approaches, as well as some blog entries that had also attempted to replicate her approach, to see if I could come up with something appropriate.

I started with her recipe for Thick cut orange marmalade, published in the San Francisco Chronicle. However, as this was a recipe for the thinner-skinned, juicier sweet oranges, I felt that I would need to modify it somewhat. One of the things I particularly liked about the tangerine and grapefruit recipe is that you get to slice across the segments, creating juicy chunks of citrus flesh with peel attached, which survive into the finished jam. However, doing this for all the oranges seemed like it would both take too long and leave me with way too much peel in the final result. I have tried making marmalade with whole oranges before (the method where you boil them whole, and then chop them) and have found that with the thick peels, you get far too much peel for my liking.

So I took a hybrid approach, slicing one lemon and one blood orange in segments with the skin on, and removing the peel before segmenting for the Seville oranges. As I did this, I removed the (copious) pips and, on Dan Lepard’s advice, popped them straight into a small dish of water. By the time I had finished the fruit preparation, this little bowl had gelled solid, demonstrating just how much pectin there is in those pips.

The final fiddly thing I did was to take the pieces of orange peel, and blanch them. I’m sure this stage is not essential, but I thought it worth doing for two reasons: one, when making candied peels, you are almost always asked to blanch the peel, sometimes repeatedly, to ‘remove bitterness’. I thought the same thing might apply here. It would also give them a headstart on softening, making it easy to slice them, and ensuring that I could cook the rest of the mixture for a fairly short period – something that’s important if you want to preserve a fresh, citrus flavour rather than aiming for a caramel one. So these were blanched, drained, about half of them sliced finely and added to the fruit. I kept the rest back to make candied peel with.

Candied orange peel

Recipe: Seville orange marmalade

This does make a rather acidic marmalade – something to really wake you up. If you are partial to chewing pieces of candied orange peel, it should be right up your street. If you prefer a sweeter marmalade, you may want to increase the sugar.

  • 1.5 kg Seville oranges (I ordered mine from Riverford organics)
  • 1 lemon
  • 1 blood orange (not essential – I happened to have one leftover)
  • 1.7kg of fruit in all
  • 600ml water
  • 750g granulated sugar

Segment the blood orange and the lemon, with the skin on and slice thinly.
Top and tail the seville oranges. Slice off the peel taking as little pith with it as possible. Then slice off the pith, exposing the flesh. Collect the strips of pith in the muslin. Segment the Seville oranges, removing the pips into a small bowl of water as you go. Squeeze any juice from the membranes that are left into the same bowl as the segments and the sliced segments, and then add the membranes to the muslin with the pith.

First boil

Take the strips of peel and cover with cold water in a medium saucepan. Bring to a boil for 2 minutes, and then drain and cool.
Slice about half of them into thin strips and add to the juice and segments.
Leave overnight.

The next day, wash your jam jars thoroughly (or put them in the dishwasher) and then place into a 110C degree oven to keep warm. Wash the lids at the same time, but leave them out of the oven.

Add the pips to the muslin, and their soaking water to the fruit in a preserving pan. Tie the muslin up with string and suspend it in the pan. Bring everything to a boil for about half an hour, to make sure the peel is really tender. It should be possible to mash it between finger and thumb. Take off the heat and remove the muslin bag. When it is cool enough to handle (after about 30 minutes), squeeze it out to release the pectin and add into the pan of fruit. You need to squeeze and massage this for a good few minutes to extract as much pectin as possible. This takes some time, but is strangely satisfying.

Pectin from pips

When you have squeezed out all the pectin you can, add a candy thermometer to the pot, add the sugar and bring back to a boil. Stir occasionally until the sugar has dissolved (it will stop making a scratchy noise on the pan as you stir) and then let it bubble quite fast until it reaches 105C on the thermometer, then test for a set.

Boiling with sugar

Pour the whole lot immediately into a Pyrex jug, and then into the hot jars. Using a tea towel, screw on the lids and inverted each jar for five minutes before returning them to the right way up to finish cooling. This helps to ensure the lids and surface are sterilised and prevents anything growing on the surface.

Blood Orange Marmalade


marmalade.JPG
Originally uploaded by louise_marston.

I have something of a glut of citrus fruit at the moment, courtesy of my weekly organic box from Abel and Cole, so my thoughts turned to marmalade. Although traditionally made with the sour Seville orange, it is also possible to use sweet oranges, especially if you up the acid and pectin content by adding lemons to the mix.

Marmalade is nothing more than orange jam, but the traditional recipe, originating in Dundee, requires two particular things – the afore-mentioned Seville orange, and finely or thickly sliced orange zest. The word marmalade comes from the portguese marmelada, which originally described a quince jam something like quince cheese or membrillo. Like quinces, citrus fruits are rich in pectin, the substance that sets jams and jellies into that particular firm and quivering consistency.

Basic marmalade principles are the same as those for other jams:
• Extract the maximum pectin. This is usually done by gathering the pips from the fruit, sometimes also the pulp and pith, in a muslin bag and boiling it with the juice before removing it and squeezing the bag to extract the soluble pectin.
• Ensure there is plenty of acid. This helps to extract the maximum pectin and gives a better set. Extra lemon juice is often used for this, but it’s not a particular problem for marmalade.
• Dissolve sugar completely before bringing the fruit and sugar mixture to a boil. This helps to prevent crystallisation

The aim is to extract pectin, and then to make a 60-65% sugar solution with the fruit by boiling off the water until this setting point is reached. I based this recipe on one for Sweet Orange Marmalade from Waitrose Food Illustrated magazine, adding a step to increase the pectin, as suggested in other recipes.

2 lemons
2 small pink grapefruit
9 blood oranges
500g granulated sugar

Zest the lemons, one grapefruit and 3 of the oranges using a vegetable peeler to remove just the zest. Finely julienne the zest.

Juice all the fruit. There should be just over 1 litre.

Add the pips, pith and remaining flesh from the fruit into a square of muslin. Add this to a pan of water and boil for 45 minutes. Leave to soak overnight.

The next morning, squeeze all the pectin from the muslin and add with the water to the juice, zest and sugar in a large pan. Heat gently to dissolve the sugar, then bring to a simmer and boil for 1.5 hours, or until temperature reaches 104 degrees C. Start testing the set on a cold saucer, looking for a wrinkle on the surface when it is pushed.

Let cool for 15 minutes or so before putting into sterilised jars (this helps make sure all the zest doesn’t float to the top).

This looks beautiful, and is quite tart because of the grapefruit. It’s possible that it would have benefited from the zest being blanched before adding to the marmalade to remove some of the bitterness.

Technorati Tags: , ,