Milk bread

Milk bread

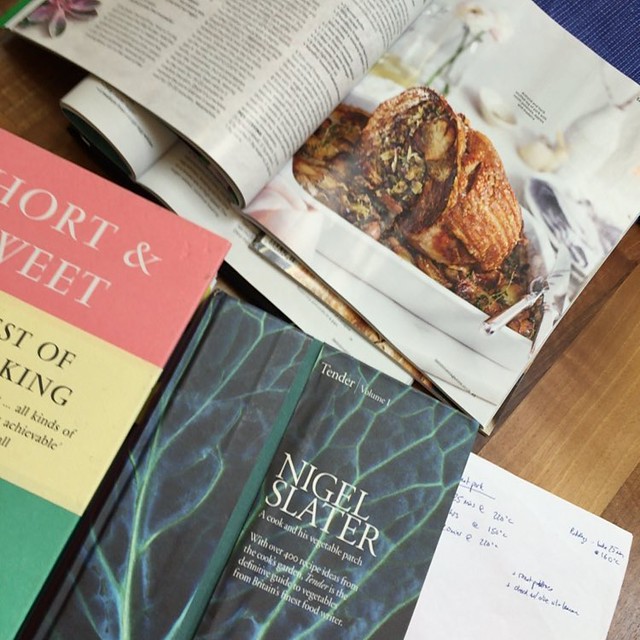
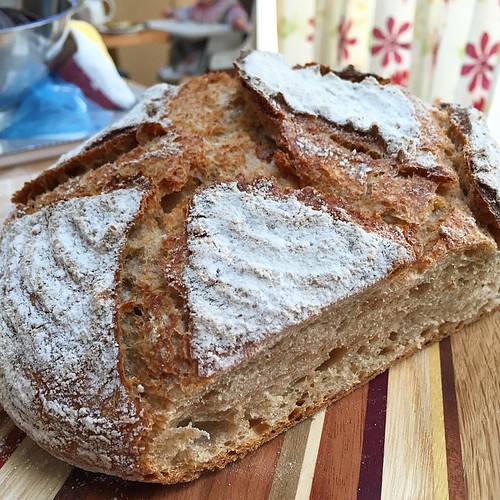
I sometimes feel that we mis-sell homemade bread. All of these ‘best bread of your life’ articles and books sell a particular vision: a craggy, very dark brown loaf, with a thick crust, and chewy, irregular interior. Loaves that take long and patient work and probably require a starter or levain of some sort. And it’s true that these loaves are achievable at home and all that time develops lovely flavours. But not everyone really likes eating them.

When you want to make a sandwich, or some really good, golden toast, that isn’t what you need. Sometimes there is a place for a soft, fluffy bread, with a thin crust that will toast really well, and won’t take three days to make. When that is what you’re after, and if that is your definition of really good bread, then what you need is a milk loaf, or a pain de mie.

This bread comes together in a few hours (although you can leave it overnight if that’s more convenient). It’s a great choice for sandwiches, toast, and even toasted sandwiches. It’s likely to be popular with children. It is gently golden on the outside, with a soft texture inside, but not as spongy and squishy as a cheap sliced loaf. A little sugar helps it to brown nicely when toasted. Not too much liquid means a nice even interior, without jagged holes that let the filling through.

Behind the recipe

All those macho, craggy loaves are flour, water, salt and yeast (or sourdough starter). Milk bread contains a number of other things: milk, butter and sugar. All of them get in the way of the flour a bit, and turn the interior from chewy and stretchy to soft and fluffy. You can also use eggs, or even a roux of cooked flour and water to soften bread. But milk, and a little butter and sugar make a nice soft loaf, but without too much richness.

The fat in the milk, and in the small amount of butter help to interrupt the gluten structure, and stop it from becoming too coarse and chewy. Baking at a high temperature for a short time prevents the crust from drying out too much and getting too thick and crusty. You can also cover the bread with a tea towel when it comes out of the oven to keep the crust soft. Some say that scalding the milk briefly will help to deactivate an enzyme in the milk, and allow the bread to rise a little more and be fluffier. I tried this with and without scalding, and couldn’t tell the difference. I warm the milk up to give the dough a headstart, and to melt and dissolve the butter and sugar, making them easier to distribute, but there’s no need to simmer it.

Milk bread recipe

  • 500g strong white bread flour
  • 1 tsp fine salt
  • 2 tsp instant dried yeast
  • 150ml whole milk
  • 1 scant teaspoon sugar
  • knob of butter – 15g/1tbsp
  • 160ml water

Mix the flour with the salt and yeast.

Add the milk, butter and sugar to a small saucepan and heat the milk just until the butter melts. Take off the heat and pour in the cold water, and wait until it has cooled down so it feels just warm to the touch. (Temperatures over about 50°C will kill the yeast – that feels very hot to touch).

Add the liquid to the flour and mix everything together with a wooden spoon until all the dry flour is gone. If you have time, leave it for 20 minutes for the liquid to be absorbed and to help develop the gluten (this is called an ‘autolyse’).

After that time, knead for about 5 minutes by hand, or with a dough hook on a mixer (or even in a food processor) until you have a smooth and springy dough. Put into a bowl and cover with cling film. Leave to rise for about 1.5 – 2 hours in the kitchen  – no need for a warm place – or overnight in the fridge.

When the dough has roughly doubled in size, and seems very puffy, briefly knead it and pat into an approximate square. Shape into a loaf by rolling it up, and put into a greased 2lb loaf tin. Alternatively you can shape the dough into two or three balls of dough and tuck them into the tin together.

Dust the top with flour, cover again with cling film, and leave to rise for about half an hour. While it is proving, pre-heat the oven to 210°C/190°C fan for about 40 minutes or until golden brown. Leave to cool before slicing – the bread will be gummy if you slice it while it’s hot.

This dough can also be made into rolls, for burger buns or sandwiches.

Bread rolls


Friday food links -3 March 2016

Figuring out dinner menu for tonight: slow-roast pork shoulder from @deliciousmag , roast potatoes, chard and marmalade sponge puddings for dessert 😋

I’m just starting to emerge from a week of being submerged under a cold. The headache is lingering, but I think I’ve turned the corner, and the sunshine today is helping too. Given the shortage of energy around here, this week’s food was anchored by leftover roast pork from Saturday, and a pot of soothing dal cooked midweek.

Dal is a great food to have when you’re feeling under the weather. It’s not very demanding to cook – at least the way I do it. You end up with something as soft and undemanding as mashed potato, but with a bit more flavour (I like to simmer it with turmeric and ginger) and a feeling that it’s doing you some good.

Recipes:

Without a recipe:

  • Dal, with sweet potato and chickpea curry from the freezer
  • A made-up pasta sauce with leftover roast pork and tomatoes
  • Ham hash – leftover roast veg, ham hock, with a fried egg on top, with cime di rapa on the side.
  • Weekend pizza
  • Pork stir-fry with broccoli and courgette
  • Milk bread (recipe coming soon)
  • Something between a quesadilla and a taco, with ham hock, caramelised onion, manchego and cime di rapa.
  • Foccacia with onions – from leftover pizza dough
  • Breaded fish with oven chips

Reading:

Avoiding flapjack failure – five tips for better flapjacks

Treacle flapjacks

Flapjacks always go wrong! My flapjacks don’t work! Why do my flapjacks fall apart? You don’t have to look too far to find lots of tales of flapjacks gone wrong. Too chewy, too crunchy, but most often, just crumbly and collapsing into a super-sticky granola. I’ve had flapjack problems before, but put this down to errors on my part. After all, flapjacks are easy – aren’t they? And Nigella Lawson’s flapjack recipe in ‘Domestic Goddess’ is notorious for causing problems (there was a misprint in early versions of the book).  So when I made some peanut butter flapjacks that were a little too willing to fall apart, I decided I was going to solve this problem once and for all. What makes flapjacks so maddeningly inconsistent?  Original flapjacks

Pretty much all flapjack recipes follow the same simple pattern: melt butter with sugar and syrup, and stir in the oats. Then bake to toast the oats slightly, caramelise the sugar a bit and dry everything out enough to be sliceable.They are such a simple idea, where could it possibly go wrong? Well, it turns out, quite a few things create pitfalls for the flapjack maker. The details of ingredients and method make all the difference between a chewy slice, a crunchy biscuit – or a collapsed pile of sticky oats.

Crumbly flapjacks

After a bit of a marathon flapjack-making session last week, plus a bit of internet searching for others who had problems, here are my tips for successful flapjacks:

  1. You need the right oats – porridge oats. This is not the place for high quality, chunky, jumbo rolled oats. Those will make great granola, but rubbish flapjacks. You want Quaker oats, or Scotts – porridge oats that are rolled fairly thin. This helps them to absorb the syrup mixture, and holds the whole thing together. The jumbo oats just get coated, and the excess tends to boil over (see photo below). Instant cook/quick cook oats are a little too dusty, but can be useful to adjust the texture if there’s too much syrup.

Overflowing peanut butter flapjacks

  1. Melt the sugar completely. If you’re using sugar in addition to syrup, make sure it dissolves completely when you heat it, or you will end up with gritty sugar granules in the final result, and a more crumbly texture. The easiest way to do this is just to heat quite slowly, over a fairly low heat, and stir every now and then. To check if it has dissolved, use the trick advised in jam making: check the back of the spoon or spatula you are stirring with to make sure the liquid coating it is totally smooth and has no granules left.
  2. Adjust the oats/liquid before baking. As oats vary so much, even following the recipe carefully you can still end up with a mismatch between the volume of syrup and the oats needed to absorb it. So stop and look at the mixture once the oats have been stirred in. Is there any syrup pooled at the bottom of the pan? If so, add a few more oats, or leave it for five minutes to let the oats soak up some of the excess, and check again. Are there any dry patches of oats, or do they look thinly covered? You want everything to be coated and slightly glossy. If it doesn’t look right, throw in a bit more syrup.

Stirring in the oats

  1. Match the baking method to the type of flapjack you want. This tip comes via Felicity Cloake’s Guardian column. Some think of flapjacks as crunchy squares – something like biscuits in slice form. Others prefer a chewy and caramelised version. You can produce both, according to this blog, with the same recipe, by baking at different temperatures for different times. High temperatures will produce a crunchier version, lower temperatures a chewier one.

Four types of flapjack

  1. Bake until browned. Ovens vary, oats vary, so you need to be fairly flexible with the baking time. Adjust the temperature as above, and then bake until the top is a little browned. The oats taste better and have a greater dimension of flavour if they get a little colour.

Hopefully following these five tips will help you to make perfect flapjacks. And once you have a recipe that works for you, stick with the same brand of oats in future to ensure it will be consistent.

Friday food links – 10 Apr 2015

Yesterday's no knead bread, this morning's toast.

I’m now into the last two weeks of maternity leave, so this has been a week of firsts, lasts and letting go gradually. I am going back to work three days a week, so there will still be time for swimming lessons, walking to the park to see the ducks, and just lazing around on the living room rug. But it’s hard to ignore the fact that that our lives will necessarily be more planned and regimented from now on. Getting us both dressed and out the door for 7:30am, getting dinner on the table for us both, and organising shopping and deliveries will all be more challenging from now on. Considering a slow cooker, but also knowing that this is not a magic solution.

Fortunately, our last full week of freedom has been warm and sunny. We bought new shoes, went to Kew to see the magnolias in full bloom, rode around the supermarket in the trolley, and played on the swings in the park. The biggest hit with E for dinner (and lunch) was a very mild chicken curry with lentils and cauliflower. She’s been sucking it off bread, eating it by the spoonful and even getting her hands in the bowl and shovelling it in with her fingers. Our sea bass, potatoes and broccoli were summarily rejected in favour of more curry. I’ve also been hunting for some more prepare-ahead baby-led weaning options for when my preparation and imagination fail me (and pinning things I find here). Food52’s Cooking for Clara column is a good one – I made these baked beans this week.

Recipes:
* Earl Grey and Honey tea loaf – Justin Gellatly’s Bread, Cake, Doughnut, Pudding
* Moroccan carrot salad – Diana Henry’s A Change of Appetite
* Baked beans – Food 52
* Chicken stir-fry and broccoli with ginger – Fuschia Dunlop’s Every Grain of Rice (a library one this, but I think I may have to buy it myself – see also Sassy Radish on this book).
* Chicken Adobado – Thomasina Miers’ Mexican Food Made Simple
* Banana cake for First birthday monkey cake in a couple of weeks – Smitten Kitchen recipe

Without a recipe:
* Chicken stock
* Chicken curry, loosely from the Baby Led Weaning Cookbook
* Saucy Fish sea bass, with new potatoes and purple sprouting broccoli
* Burgers and wedges

Reading:
* This piece on food in Homer, Alaska is a wonderful piece of writing, and is nominated for a James Beard journalism award (via Orangette)
* Apparently merveilleux are the new macarons
* Baking a cake for the first time can be daunting – here a cook (but not a baker) shares her worries
* The head chef at Yotam Ottolenghi’s Nopi restaurant left to be a school cook – inspiring stuff.
* Lots of sweet recipes appearing over Easter: carrot graham layer cake (graham crackers are more or less digestive biscuits); Ottolenghi on chocolate; Diana Henry on pistachios
* Lizzie at Hollow Legs has a new book out on Asian cooking – she lists her 5 essential ingredients here. (I must make another trip to Chinatown soon).

Pancake day – around the world

It’s pancake day! We all know that pancakes are made on Shrove Tuesday, the last day before Lent, to use up eggs, milk and butter that are fasted until Easter. But the tradition isn’t quite as straightforward as that. Pancakes are also associated with a pagan festival of the start of spring, their round shape representing the sun, which battles with the forces of winter, and triumphs when spring arrives. It’s also a very long time since fasting from dairy was commonplace in Britain. Starting with the dissolution of the monasteries and the creation of the Church of England in the 16th century (Wolf Hall fans take note!), the customs of the Roman Catholic church started to recede. According to Clarissa Dickson-Wright’s ‘A History of English Food’, the rules against the consumption of dairy during Lent were abolished in 1541, and by the time of Pepys, very few Lenten traditions were being observed at all.

Pancake Day must have been a very popular festival to have survived so long without the religious motivation. Dorothy Hartley in ‘Food in England’ distinguishes the English pancake tradition from the European one:

“Abroad pancakes are usually open and piled up together. In England, our pancakes are symbols of our insular detachment, for each is rolled up by itself, aloof, with its own small slice of lemon.”

But what to make if you’re not really in the mood for British pancake tossing? There are lots of other traditional bakes from around the world that celebrate the start of lent, and the last days before the fast starts before Easter. They all have similar ingredients, but in different proportions: butter, milk, eggs, flour – and in many cases, yeast too.

Friday food links – 31 Oct 2014

Chocolate Malteser cake

Hard to believe it’s the end of October – today was warm and sunny: it could have been June. Still, there are leaves on the ground, and soups and stews are starting to become a more regular feature of the menu.

What makes meringues chewy?

piped meringue stars

Meringues are one of the simplest things to bake, with just two ingredients. But because of this simplicity, there isn’t much room for error. As with many baked goods that are difficult to get right, there is also a wide range of views on what the ideal meringue is like. Some want a completely crisp shell that shatters on the touch of a fork – ideal for something like Eton Mess where the meringue is smashed into pieces.

Others are looking for a chewy centre, almost like nougat. This is often the ideal state of a pavlova base. Finally, there’s the type of soft pillowy meringue used to top a lemon meringue pie.

Chewy almond meringue

All these are meringues that use egg whites and sugar – so what’s the X factor?

What is a meringue?

A meringue is an egg white foam that is made more stable by adding sugar. The sugar syrup supports the bubbles, and holds them up while they dry, leaving behind the sugar and egg-white-protein structure. Egg whites are pretty amazing at creating a foam anyway, owing to all these stretchy proteins they have. However, if you keep beating egg whites on their own, they will go too far – first becoming grainy and then collapsing on themselves.

Tips for making meringues:

  • Adding sugar to the eggs right at the start will make it slower to foam in the first place, so wait until you have a foam.

egg whites - soft foam

  • However, unlike egg whites on their own, it’s really hard to overbeat meringue, so if in doubt, add it early on, when the foam is still quite soft (a lot of recipes ask you to wait until you have stiff peaks before adding the sugar, but this isn’t necessary, especially if you’re using an electric whisk or a stand mixer). After the sugar is all added, you can also leave it whisking for a good few minutes to make sure you have a really stiff foam.
  • The more sugar you add the more stable the foam – you can use anything from 1:1 sugar to egg white (by weight) to 2:1, with the upper end being more common. For a 2:1 ratio, weigh your egg whites out, and then add twice the weight of sugar.
  • The sugar needs to dissolve, so use caster (superfine) sugar or icing sugar, and add it gradually. Warm or room temperature egg whites will make it easier to dissolve. Yotam Ottolenghi has a nice trick for his salted almond meringues – heating the sugar in the oven, then adding it gradually.
  • A little bit of acid helps egg whites to foam – you can wipe the bowl with a lemon, add a little cream of tartar or a few drops of vinegar.

And one more thing? Because egg whites are pretty much just protein and water, there isn’t much in them to go off. This means that you can keep egg whites quite safely for several weeks in the fridge. Or they freeze well (but never defrost in the microwave – they cook too quickly!).

For a crisp meringue

Here, we are after a meringue with all of the moisture removed so all that is left is the brittle egg white and sugar structure. To do this, use a ratio of 2 parts sugar (by weight) to 1 part egg white. As a large egg white is about 28g, that means about 110g (4oz) sugar for two large egg whites (or 100g for medium whites).

You also then need a very low temperature and a long time to make sure that all the water evaporates without browning the sugar. Something around 100°C/212°F is about right. When you have finished baking, leave the meringues in the turned off oven to cool, and remove any last moisture.

salted almond meringues to be baked

For a chewy meringue

If a meringue is chewy in the centre, it just means that it managed to hang on to some of the moisture in the foam. You still want a hard shell, so use 2 parts sugar again, or something close to it. You can add things to the mixture to help it hang on to this moisture – a little bit of cornflour being used most often. Chopped or ground nuts, as in french macarons or dacquoise, will also do this, partly by adding a bit of fat.

The other thing that will help make a chewy meringue is to bake them a little hotter and for a shorter time, meaning the centre doesn’t have the chance to dry out. Be careful of baking too hot though – this will cause the meringues to swell, and may overbrown the outside. A temperature of about 130°C/265°F is good.

For a pie meringue

Meringue-topped pies can be difficult. It can be particularly tricky to make sure it sits nicely on top of the topping, and to avoid moisture from the filling moving into the meringue, and making it ‘weep’. But in principle, it’s like the chewy meringue, but more extreme – it needs even more moisture in it, needs to stay stable, and you want the outside to cook very quickly and brown, before the inside dries at all. So add cornflour to stabilise it, and bake in a much hotter oven – around 170°C/340°F – to get a nice crisp top. Felicity Cloake’s Perfect Lemon Meringue Pie is a good guide.

Meringue recipes

I’ve made a couple of really good meringue recipes recently. Via pinterest, and this blog post by Jillian Leiboff, Yotam Ottolenghi’s salted almond meringues are really lovely – crisp outsides, chewy in the middle, and scented with both toasted almonds and almond extract.

This one, however, is an old favourite – adapted from a recipe in Flo Braker’s ‘Sweet Miniatures’. These are gluten-free, dairy-free chocolate cookies – little drops of meringue flecked with chopped chocolate.

Chocolate Meringue Stars

adapted from Flo Braker’s ‘Sweet Miniatures’

Chocolate meringue bubbles

– 100g caster sugar
– 2 large egg whites (55g)
– 45g dark chocolate

Line a baking sheet with parchment. Heat the oven to 110°C/100°C fan/225°F.

Grate or finely chop the chocolate, or grind it in a food processor until fairly fine.

Whisk the egg whites with an electric hand whisk or the whisk attachment of a stand mixer. Whisk slowly to start, as the protein unravels and the egg whites loosen up. Then increase the speed and whisk until a soft foam forms. Add the sugar a few spoonfuls at a time, whisking thoroughly between each, and then keep whisking for about three minutes until you have a very stiff and shiny foam.

stiff, shiny meringue

Remove the whisk and fold in the chopped chocolate until it is fairly evenly distributed.

folding in the chocolate

Use your finger to put a little meringue on the four corners of the parchment, and turn over to stick the parchment to the baking sheet (this stops it moving around when you pipe onto it).

Scrape the mixture into a piping bag with either a plain or star-tipped nozzle. If you don’t want to pipe them, simply use teaspoons to drop pieces of meringue about the size of a golf ball onto the baking sheet.

Bake for 1 hour. The finely chopped chocolate, combined with a short bake time means the centres should be chewy and chocolatey.

chocolate meringue stars

Further reading:

You might also be interested in these posts:

Brown butter financiers or friands

Untitled

I sometimes come across this sort of silicone bakeware, and wonder what on earth it’s for (although if it’s as nice as this sunflower one, I don’t worry too much about that). But then I remember financiers. Financiers, or friands, are not something you often come across, but they are a great recipe to know about. Made with egg whites, melted butter, flour, sugar and ground nuts, they are moist little cakes that keep really well.

Financiers are from the French kitchen, and used to be baked in little gold-ingot like bars, which gave them the name. Traditionally, they would be made with brown butter and ground almonds – a rich and somewhat expensive combination which may account for the name. Friands are the antipodean version, less likely to include anything as fussy as brown butter, and more likely to be a carrier for raspberries, blueberries or other fruit flavours.

Another good reason to have a friand or financier recipe on hand is that they are a great way to use up leftover egg whites. Unlike macarons and other egg white recipes that use a meringue base, these don’t require the whites to be whisked to peaks. They only need a little whisking to break them up, and you can easily use 3, 4 or 5 egg whites for one batch of cakes (handy if you’ve been making ice-cream).

Untitled

Because of the melted butter and nuts, these are quite dense and rich little cakes, that are best baked in small tins. Friand tins are little oval shapes, but mini muffin tins are the perfect size, if you grease them well. You can also use silicon bakeware in lots of beautiful shapes, like this sunflower mould I picked up in Paris. This seems to cook them more evenly, although you also get less of the brown crust. When baked, the outside should be lightly browned, and when cool, just a little crisp. The interior will be rich and dense with the nuts.

They are a great thing to have on hand if you think you don’t want a proper dessert or cake, just something sweet to nibble with tea or coffee at the end of a meal, or as a pick-me-up in the middle of the afternoon.

For these sunflower cakes, I wanted to keep the mixture plain – no berries or other decorations, so that the shape of the sunflowers would show up nicely. Instead, I used the traditional French approach and made brown butter, which along with a little vanilla, formed the only flavouring. There will be more on alternative flavours for financiers in a forthcoming post.

Scroll down for more on what’s behind the recipe, including details on brown butter and the role of the egg whites.

Brown butter financiers

  • 150g brown butter
  • 165g egg whites(5)
  • 175g icing sugar
  • 50g plain flour
  • 100g ground almonds
  • 1 teaspoon vanilla extract

First make the brown butter, as directed below, and set aside to cool.
Preheat the oven to 200C/180C fan/400F and thoroughly butter your moulds or tins.
Whisk the egg whites gently to loosen them, but not enough to create a froth. Sieve the icing sugar, flour and almonds onto the whites and stir together until combined.
When the butter has cooled but is still liquid, add to the mixture and fold together gently until completely combined and homogenous. If you like, add some vanilla extract or a drop or two of almond extract.

Untitled
At this stage, you can refrigerate the mixture overnight or for a few days, until you are ready to bake.
Fill the moulds about 80% full, and bake for 8–12 minutes. The timing will depend on the tins you are using – both the material and the size. They are ready when cooked through – test with a skewer – and with toasted brown edges.
Leave to cool for 5–10 minutes and then turn out of the tin while still warm. If using metal tins, you may need to use a knife to ease the cakes away from the sides. Eat the same day if possible – although they will keep for several days in a tin, the texture won’t be quite as good, and you won’t get the same contrast between crisp edge and soft, dense interior.

What’s behind the recipe?

Brown butter

Untitled
Brown butter is what happens when you cook butter until the water has all evaporated and the temperature rises high enough to toast the milk solids in the fat. This produces a little bit of brown sludge at the bottom of the pan, and a lovely toasty, nutty flavour in the butter. It’s sometimes called beurre noisette, and used as a sauce in some dishes of French cookery.

You may have made brown butter accidentally before, by putting butter into a too-hot pan, and seeing the little brown grains appear. Brown butter, made deliberately, is usually done in a small saucepan, of pale metal so that you can see the browning, with a larger quantity of butter. Melt the butter over a moderate heat.

Once the butter is gets close to 100C the water in the butter will start to boil (about 15% of butter is water, depending on the brand you use). Let this bubbling continue. When the water has all gone, it will stop bubbling, and go quiet. This is when you need to pay close attention, and probably stir occasionally. The milk solids – those white, milky parts that appear when you melt butter – will sink to the bottom of the pan and be the first to brown, so you need to scrape them off and stir them about to make sure nothing burns. You might also start to get a foam on the top of the butter. Once the solids at the bottom are a nice nut-brown, and the whole thing smells nutty, remove it from the heat and pour the whole thing into a heatproof bowl or measuring jug. This will help to stop the cooking and make sure it doesn’t brown any further and start to burn. Most recipes using brown butter, including financiers, will need the butter to be cooled – it will be extremely hot when it comes out of the pan.

Why whisk the egg whites if you’re not going to form peaks?

Financiers don’t need the aeration you get from an egg white whisked into snowy peaks, but the recipes often ask you to whisk them a little. Why? The proteins in egg white attach to each other very well, which is why a really fresh egg broken onto a plate will ‘sit up’, and why it’s so hard to divide an egg white in half, if you’ve ever tried to do that. Whisking the whites just a little helps to break apart the proteins and loosen the whole thing up. This makes it much easier to mix in the other ingredients.

Why do financiers only have egg whites in?

Financiers are a puzzle to me. Here is a little tender cake, that doesn’t have any baking powder in, and doesn’t whisk air in through creaming or whisked egg whites. So what makes it rise instead of being a flat pancake?

My best guess is that the egg whites provide a stretchy protein structure, so that when the water and fat in the recipe heats up, and steam is released, the stretchy egg proteins are there to capture it and keep the bubbles in the final cake. There is very little flour in the recipe, so the egg white proteins are likely to be contributing most of the structure that holds the cake together. Ordinarily, egg whites create quite dry, crisp things, but all those nuts and butter keep things rich here.

Some other great friand recipes:

Drømmekage – dream coconut cake

A slice of Drommekage

Drømmekage is a genoise sponge beneath a layer of coconut caramel – a plain cake made glamourous with a baked-on topping. This one is from a recipe by Signe Johansen, from her cookbook ‘Scandilicious’. It belongs to a class of Scandinavian baking that seems to be closely linked to German traditions of Kaffee and Kuchen – Swedish Toscakaka and German coffee-cakes with streusel toppings. There is a Danish word for the togetherness of coffee and cake, hearth and home: hygge. (It also appears on this excellent map of untranslatable non English words. These are cakes designed to be sliced and shared through an afternoon, not squirreled away in a tin for later. It was certainly devoured by my work colleagues last Friday, and generated not a little happiness.

A cake with a baked-on topping is a great thing. A plain cake, but with a little something extra. They strike a nice balance between the slight austerity of a very plain Madeira or pound cake, and the over-the-top elaborateness of a piled high cupcake or layer cake. Whether its flaked almonds on top of a bakewell tart, or a handful of granola on the top of a muffin, they provide not just decoration but a contrast in texture and flavour.

In this cake, the cake is too delicate to add the topping before it is baked, so the solution is to bake the cake, then add the topping and bake again to brown it and merge it with the cake beneath.

This makes it especially important to know when the cake is done – adding the topping too early will (as a Danish colleague warned me) sink the cake, collapsing the sponge into a dense layer. It’s also important to recognise when the caramel is thick enough to top the cake without sliding off.

I’ll give you the recipe, reproduced with very kind permission from Signe’s book, then discuss what’s happening behind the recipe – what are the critical steps?

Drommekage - Danish coconut cake

Drømmekage – Danish Coconut Dream Cake

from ‘Scandilicious – Secrets of Scandinavian Cooking’ by Signe Johansen, Saltyard Books
(and if you like this and live in London, you should definitely consider attending Signe’s Scandi brunch and supper club).

  • 4 medium eggs
  • 300g golden caster sugar
  • 1 teaspoon vanilla extract
  • 150g butter, melted
  • 150ml buttermilk (or a mixture of yoghurt and milk)
  • 300g plain flour
  • 3 teaspoons baking powder
  • 1/4 teaspoon salt

Topping
– 200g butter
– 200g light brown soft sugar
– 150g dessicated coconut
– 100ml whole milk
– 1 heaped teaspoon vanilla sea salt (I used a scant teaspoon sea salt plus half a teaspoon of vanilla bean paste)

Preheat the oven to 190C/170C fan/gas mark 5. Line a 20x30cm deep rectangular cake pan with parchment paper, leaving a 2 inch overhang to help remove the cake later. It helps to have the paper extend above the sides of the tin a little to contain the topping later.

Melt the butter and leave to cool a little. Combine the flour, baking powder and salt in a bowl, and mix with a whisk to distribute the baking powder.

Using an electric mixer beat the eggs, sugar and vanilla together until thick and pale, the batter should form a ribbon when the whisk is removed from the bowl. This will take several minutes on high speed. If you’re not sure whether it’s thick enough, give it another minute.

Pour in half the melted butter and buttermilk and sift half the flour onto the batter. Fold the batter together with a large metal spoon, trying to incorporate as much of the flour, butter and buttermilk without knocking out the air from the eggs.

Pour in the remaining butter and buttermilk and sift over the remaining flour. Fold the batter as above.

Pour the batter into the prepared cake pan and bake for 20 minutes or until the cake has doubled in size, looks light golden brown in colour and is firm to the touch. A toothpick inserted into the cake should also come out clean. You want to be sure it has baked thoroughly and will bear the weight of the topping to come.

Whilst the cake is baking make the topping by adding all the ingredients into a medium saucepan set over medium heat, stirring constantly to prevent the sugar from burning. Cook for 5 minutes until the mixture has thickened and some of the liquid has evaporated. It will reduce a little and also change colour to a slightly darker shade of brown. You want something thick enough that it will spread over the surface, and not run too much.

Once the cake is out of the oven turn the temperature up to 220C/200C fan/gas mark 7. Spread the topping evenly over the cake, return to the oven and bake on the upper-middle shelf for 5–10 minutes until the topping is a toasted deep golden colour (I found this step took more like 15–20 minutes in my oven). Cool in the tin before cutting into squares to serve. As the topping had set into a lovely chewy caramel in some places, I found it easiest to turn it over onto a board, topping side down, and slice with a serrated knife.

Behind the recipe

So what’s going on behind the recipe? Where are the critical steps? I think there are four steps that are particularly important:

Whisking the eggs well enough to support the rest of the cake

What makes this a genoise-type of sponge is that it is based on a first step of whisking the eggs and sugar together until thick, rather than the more usual process of creaming together butter and sugar. This thick mixture is known as ‘taking it to the ribbon stage’, as the mix should form a thick ribbon as it trails down from the whisk into the bowl. Once this is done, the other ingredients – in this case, flour, melted butter and buttermilk – are folded in.
Eggs and sugar whisked together – whether just egg whites or whole eggs – will form a pretty stable foam that can hold lots of air, even when deflating ingredients like butter and flour are folded in. It’s almost impossible to over whisk eggs once a substantial amount of sugar has gone in, so if you want to err on the safe side, just keep going with the whisk a bit longer. This is one of those times where you will give up your right arm for an electric mixer – the handheld ones work really well and are not expensive. I used my Kitchenaid with a whisk attachment.

Baking until firm enough to support the topping

In order to support the caramel topping, it’s important to bake the cake until all trace of liquid cake batter has disappeared, and the cake is fairly firm. The recipe gives the baking time as 20 minutes, but given all the variations in oven temperatures and baking tins, you should always check for doneness before the time is up, then at five minute intervals until it looks close. The first thing I check for with a sponge, whether genoise or creamed, is whether you can still see a wobbly lake of batter in the centre. If a gentle shake of the tin reveals there is still a puddle under the surface you can safely give it another five minutes. Once that has gone, you might want to check more frequently with either a skewer, cocktail stick or small paring knife to see that crumbs rather than liquid batter sticks. To test whether it is firm enough to support a topping, lightly pressing the surface with your finger, to see if it will resist and spring back, is another good test.

Cooking the caramel on the stove

The recipe asks for the caramel mixture to be cooked in a saucepan before adding it to the cake. Caramel is a really temperature sensitive thing, and the thing to know about caramel temperatures is that it won’t start to rise much above 100C until almost all the water is removed from the mixture. This is (I presume), why the mixture is first boiled on the stove – to remove most of the water, and create something that will readily form a set caramel in the oven. I found that the volume reduced quite a bit, and the colour changed from a pale gold to a darker shade.

Baking the caramel to caramelise it further

The aim of this final stage is to convert the sugar from a runny caramel to a chewy toffee-like topping. This means baking it in the oven long enough to caramelise it further and ensure it sets in place. I had difficulty with this stage, as my tin wasn’t deep enough, and as it baked, the topping overflowed the paper lining and spilled over into the oven. Having a very even surface to the cake will help make sure the topping browns evenly, and if you know your oven has some hot spots, keep checking and turn it around periodically, so that it evens out (I put my tin on a baking sheet at this stage to catch any overflowing topping, and also to make it easier to turn around).

Cake baking – more cake foundations

In the last post, I looked in detail at creaming the butter and sugar, the starting point for many cakes. This post follows what happens next – adding the eggs, flour and then baking.

Fairy cake inside

I found a great description of what happens in a cake in Rose Levy Berenbaum’s Cake Bible:

“Ingredients fall into two categories: those that form and strengthen the cake structure and those that weaken it”.

The flour and eggs provide the protein that holds the cake structure up, and stop it from collapsing into a pancake. The fat, sugar and leavening all weaken the structure in different ways, making the cake tender and soft instead of tough and chewy. The balance between the two sides is important for capturing the air that makes cakes soft and light.

Adding eggs – what happens when it curdles

Almost as soon as I put the last post up, someone asked what happens if the mixture curdles. I have looked into this problem before – most people seem to say it can be avoided, perhaps marginally reduces the volume of the final cake, but if it does happen, you can carry on without problems.

But what was unclear was what caused it to curdle in the first place – was it really not enough creaming, or something else?

Curdled mixture with eggs

When the mixture curdles, what you see appearing are lumps of fat and sugar, surrounded by a thin watery liquid. The clearest explanation I found came from Shirley Corriher in ‘Bakewise’. She describes this as a:

“switch from the the water-in-oil emulsion that you want to an oil-in-water emulsion”.

This probably only makes sense if you know what an emulsion is. An emulsion is simply one liquid suspended in another. In this case, when you start to add the eggs, you are aiming for little droplets of the water from the eggs, suspended through the fat-and-sugar mixture that is already there. At some point, the liquid from the eggs can overwhelm the amount of fat, causing the bubbles of water to all join up and become the main part of the mixture – the continuous phase, as it’s called.

To prevent this happening, you need to ensure that the fat and sugar are able to hold as much liquid as possible – which means soft, but not melted. You also need to add the egg very gradually, so that it doesn’t overwhelm the mixture. This is the same principle as adding oil to mayonnaise – go slowly and incorporate each bit before you add some more.

Finally, the solution once it has curdled – which it might well do – is to stop beating it and add some flour. This will absorb the excess liquid that’s starting to pool, and shift the balance back again.

With flour added

Speaking of Shirley Corriher, this is a brilliant excuse to link to my favourite food science programme, Good Eats:
Good Eats: A Cake on Every Plate

Shirley appears at about 4m30 (disturbingly extolling the virtues of cake flour, which you can’t get in the UK because it’s chlorinated, and the EU aren’t big fans of that idea).
Alton also talks about creaming and bubbles at about 8m30. He also has kick-ass flames painted onto his KitchenAid mixer.

Adding flour

Once the eggs are in, the final step is to add the flour, and any liquid that might be called for. These are often added in alternate batches, so that the mixture gets neither too stiff nor too runny as they go in – either might deflate the air.

An often neglected step is to thoroughly sift the flour and baking powder together. This isn’t necessary if using self-raising flour, but when adding baking powder, there is always the risk that small lumps of leavener will persist in the batter, and produce large ugly holes in the final cake. If you really want a fine texture, sift two or three times before it goes into the batter.

The other important thing when you add the flour is to stop folding or stirring as soon as the flour has disappeared into the mixture – don’t mix any more than you need to. As soon as the flour makes contact with the liquid in the eggs, and any added liquid like milk, it will start to make gluten. The more you mix at this point, the longer and stronger the gluten will become, and the tougher your cake will be.

Baking

The final point is on baking. The balance here is between allowing the leavener time to work and expand, and setting the egg and flour proteins in a structure that will hold the air. Bake at too high a heat, and the leavener might not have had time to work before the batter sets, making a more dense cake with a closer texture. Bake at too low a temperature, and the gas might bubble to the surface and disperse, and so be lost that way. A medium temperature will set the batter at the right point, and bake through evenly without making the surface too dark and brown.

An alternative method – the two stage approach

When consulting Rose Levy Berenbaum, I discovered that she actually doesn’t recommend creaming at all. Her favoured approach is a different one completely. She combines the flour, sugar and fat together with a little egg, and beats thoroughly to incorporate air. Then she adds the remainder of the egg, and other liquid in batches.

This approach takes a different route to the issues above. By combining the fat directly with the flour, it can be coated to prevent the liquid getting at the protein and forming gluten. The flour-sugar-fat mixture can still hold air, so the creaming still generates volume. And the eggs are added only once the flour is already there to absorb liquid, so there is no risk of curdling.

I haven’t tried this approach more than once or twice, but I will be trying it out alongside regular creaming to see what effect it has. Watch this space.